Category: Webisodes

Webisode 8: Mexican Poutine Smashers Are Perfect For Halloween!

Webisode 8: Mexican Poutine Smashers Are Perfect For Halloween!

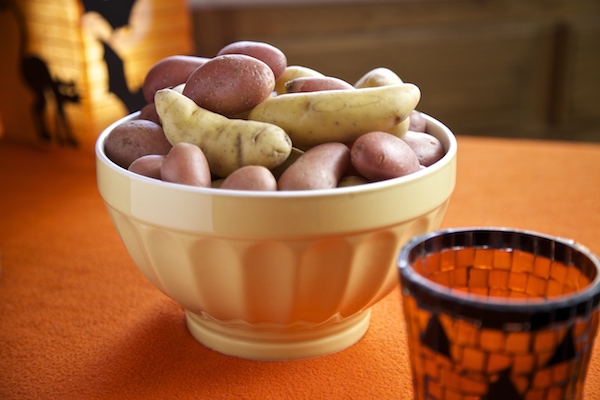
I’ve got it!  The perfect dish to serve at your Halloween party, Mexican Poutine Smashers are everything you ever wanted in a finger food and more.  I am proud to present this special Halloween webisode using Idaho Fingerling Potatoes as my base and topping them with barbacoa and Oaxaca cheese.  Watch the webisode for further instruction, and lots of tricks and treats!  Stick around until the ugly witch flies away…..

Idaho Fingerling Potatoes

Ingredients for Mexican Poutine Smashers:

  • Idaho Fingerling Potatoes
  • olive oil
  • sea salt
  • barbacoa
  • shredded Oaxaca cheese

Ingredients for barbacoa:

  • 1 – can chipotle peppers in adobo sauce
  • 1 – onion
  • 5 – cloves galic
  • 6 – limes (juiced)
  • 1/3 – cup apple cider vinegar
  • 2 – cups beef broth
  • 5 – pounds chuck beef roast
  • 4 – bay leaves

Directions:

  1. Add chipotle peppers, adobo sauce, onion, garlic cloves, lime juice, apple cider vinegar, and 1 – cup beef broth to blender. Blend until smooth. Set to the side.
  2. Pour additional 1 cup beef broth to slow cooker, place the chuck beef roast to the broth, and add in the bay leaves. Pour the chipotle pepper blend over the meat.
  3. Cover the slow cooker with the lid and cook on low for 10 hours.
  4. When meat is done, shred with two forks for the perfect batch of barbacoa.

THANK YOU to Idaho Potato Commission for your support.  A HUGE, grateful thank you to the most wonderful crew EVER! This one was a lot of fun to make!

  • Mando Lopez: Director
  • Tony Molina: Director of Photography
  • James Ford: Editor
  • Leeann Chavez: SPFX Make-Up
  • Janine Presley: Sound
  • Kristen Warren: Wardrobe and Positivity Ambassador
  • Suki Ewers: AC
  • Jeshua Viveiros: Set Assistant and “Mummy”
Disclosure: This video was sponsored by the Idaho Potato Commission.
Webisode 7: Papa And Pork Chile Verde with The Vieja

Webisode 7: Papa And Pork Chile Verde with The Vieja

Disclosure: The most grateful thank you to the Idaho Potato Commission for sponsoring this video. We appreciate all the support you have given us, and LOVE partnering with you!

Chile Verde is an all time family favorite since as far back as I can remember. My grandfather used to make it when I was a little girl, then my Auntie Rosie took the reins and she is the one who taught me how to make it. My family puts big chunks of potatoes in our chile verde for a delightful dish you’ll never forget! Here is my latest webisode showing you how we make it….. except I had Vieja Chile Verde come supervise. Keep an eye out for my band at the end! 🙂

Ingredients for Chile Verde Con Papa:

  • 6 – tomatillos
  • 4- hueritos chiles
  • 4 – serrano chiles
  • 4- jalapeno chiles
  • 2- garilc cloves
  • a pinch of oregano
  • 1 – tablespoon beef bouillon
  • 1 – capful white vinegar
  • 1 – cup of boiled chile water
  • 2 – tablespoons vegetable oil
  • 4 – lbs cut pork tenderloin
  • 5 –  bay leaves
  • 1 –  white onion
  • 4 – cups of chicken broth
  • 4 – russet Idaho potatoes

Directions:

  1. Boil chiles and tomatillos for 25 minutes.
  2. Then add chiles, tomatillos, garlic cloves, oregano, beef bouillon, vinegar, and chile water into a blender. Blend until chunky. Set to the side.
  3. In a large dutch oven over a medium high flame add oil and allow to heat till hot, then add in pork tenderloin cubes and braise on each side.
  4. Add in bay leaves and onion.
  5. Pour in chicken broth and bring to a boil. Once boiling lower flame, add a lid and allow to simmer for 2 hours.
  6. Next add in potato chunks and green chile. Cover with lid and continue to simmer for an additional 30 to 40 minutes or until potatoes are fork tender.
  7. Enjoy!

Thank you with my entire heart and gratitude to my most awesome crew! I sincerely love you guys big time.

Director: Mando Lopez
Director of Photography:  Tony Molina
Camera Assistant: Suki Ewers
Producer:  Lacey Reilly
 Editor:  Max Azpiazu
Set Design:  Mando Lopez
On-set morale booster: Kristen Warren
Sound and Make-up:  Janine Presley
Lighting Equipment: Paul Hopkins
Band Music: Mando Lopez, Andrea Bulletti, and Anthony E. Martinez
Vocals: Nicole Presley
Sound Engineering: Manny Nieto
Opening Music: Anger Bros
Thank you Melissa’s Produce for donating all the GREEN CHILES!!!!

The most grateful thank you to the Idaho Potato Commission for sponsoring this video. We appreciate all the support you have given us, and LOVE partnering with you!

Webisode 6: Salted Cajeta Chocolate Flan

Webisode 6: Salted Cajeta Chocolate Flan

Ever fall hopelessly head over heels in love with flan?  The type of love where you have tunnel vision, and all your surroundings just fade to black because all you could think about is your flan?  I had it bad, I was MAD…. as in madly smitten with the sweet and salty cajeta drenched chocolate flan that I had to do something grandiose as a gesture of my amor.  I made this video so lovers around the world could unite and  find themselves in the arms of a delicious flan!  HAPPY VALENTINE’S DAY!

Ingredients for Salted Cajeta Chocolate Flan:

  • Non- stick baking spray
  • 1/2 – cup cajeta
  • 1 – 7.6 ounce Nestle’s Media Crema
  • 12 – ounce semisweet chocolate chips
  • 5 – large eggs
  • 4 – ounces of cream cheese (room temperature)
  • 1 – 14 ounce can of  Nestle’s La Lechera Sweetened Condensed Milk
  • 1 – 12 ounce can of evaporated milk
  • 1 – tablespoon vanilla
  • sea salt to taste

Directions:

  1. Spray a 12 cup budnt pan with non stick spray.
  2. Pour cajeta evenly into bundt pan. Set to the side.
  3. In a medium sauce pan over a medium flame add Media Crema and chocolate chips and stir until completely melted and smooth. Remove from heat and allow to cool for 15 minutes.
  4. Add eggs, cream cheese, La Lechera, evaporated milk, and vanilla to a blender. Blend till smooth.  Then add in the chocolate mixture and blend till combined.
  5.  Pour flan mixture over the cajeta filled bundt pan.
  6. Cover the bundt pan with a piece of aluminum foil and place inside a large pyrex baking dish.  Pour hot water into the pyrex baking dish to fill up half way.
  7. Then place the baking dish into the oven and bake for 1 hour.
  8. Once out of the oven, remove from water bath and uncover to allow cooling.  Run a small knife around the edge to ensure it from sticking.
  9. Let the flan rest for two hours then flip it over onto a plate.  Slowly lift pan up away from plate.
  10. Place in the fridge for 5 hours or overnight.
  11. Sprinkle top with sea salt right before serving.
  12. ENJOY!
Thank you with my entire heart and gratitude to my most awesome crew! I sincerely love you guys big.
Directors:  Mando Lopez and James Ford
Director of Photography:  Tony Molina
Producer:  Lacey Reilly
 Editor:  James Ford
Set Design:  Mando Lopez
On-set morale booster: Kristen Warren
Sound:  Adriana Sanchez
Equipment: Paul Hopkins
Opening Music: Anger Bros
Disclosure: This post is sponsored by Nestle, the recipe and opinions are completely my own. 
Webisode 5: Christmas Special: How to make Tamales

Webisode 5: Christmas Special: How to make Tamales

Merry Christmas Everyone!  We decided to put this webisode together to help anyone out who is anxious to start making tamales this holiday season or just wondered how it’s done.  Without further ado…. Here’s our Christmas Special (Everyone loves a Christmas Special, right!?)

Tamale Tips:

Buy your masa prepared from your local Mexican/Latin Market or use Maseca Masa for Tamale flour.  For those of you that live in Los Angeles, I buy my masa at a place called “La Favorita,” and have been buying from them for YEARS!  They are located at 600 N. Brannick Ave, Los Angeles, CA 90063.  The best in Los Angeles. 🙂

I wrap my tamales in corn husks but take it a step further and wrap them additionally in a grease resistant 12 x 12 sandwich wrap paper.

A friend asked where do you pour the water when you are steaming your tamales and want to replenish the water?  You pour it right on the side of the tamale pot.  The tamales are covered in corn husks on top and damp towels.  The water is NOT going to disturb them at all.

If you are looking to be less stressed right before the holidays, make your tamales in advanced and freeze them in a ziplock raw (make sure to mark them so you know which side is the opening). Then the day you are ready to enjoy them, take them directly from the freezer and straight into the steamer and steam them for 5 1/2 to 6 hours.

If you are unable to find a tamale steamer pot, you can always make your own.  Use a smaller pot with a vegetable steamer basket placed at the bottom or flipped upside down.  Place enough water and a penny at the bottom of the pot, when you hear the penny bouncing that means the water level is low and time to replenish.  Make note, the water level will go low.  Also, you don’t want the water level to ever surpass the vegetable steamer.  Then follow the directions in the video. Make sure to cover in corn husks on top and a damp towel.

Place the Idaho potato in the tamale raw, it will cook as the tamale steams.  The potato is the perfect addition to a meat tamale or a vegetarian one.

In the vegetarian tamales on the video, I used green anaheim chile strips, but I personally use jalapenos in place of the green chile strips for more heat. Feel free to swap them out if you love the heat or don’t at all.

I usually season my masa with green chile for the vegetarian tamales and for my green chile pork tamales.  For my red chile beef tamales (which were not featured in this video) I season the masa with the red chile.  I also use the red chile inside the vegetarian tamales.  I am adding the recipes for both chiles below.

I make my chiles the day before I’m going to make my tamales.  I also chop everything I’ll need and cook my meat in the crock pot. For the pork, I use the pork shoulder.

Feel free to leave me any questions and I will follow up with you right away.  This is a very traditional recipe but also a very ambitious one….. but heck, give it a whirl.  This is such a fun recipe to attempt.

Here is my green chile recipe:

  • 9 – tomatillos
  • 6 – guero chiles (yellow chiles)
  • 8 – serrano chiles
  • 7 – jalapeno chiles
  • 5 – garlic cloves (browned/fried)
  • 3 – cups of water (from water chiles boiled in)
  • 1 – teaspoon of vinegar
  • 2 – teaspoons chicken bouillon (I use Knorr)
  • 1 – teaspoon dried oregano
  • 1 – teaspoon black pepper

Fill two pots halfway with water and place over a medium high flame.  Bring water to a boil.  Then put tomatillos in one pot and in the other put all chiles.  Boil tomatillos for 15 minutes, you will know they are ready when they go from light green to a greenish yellow color.  Remove from flame and set to the side.


Boil chiles for 30 minutes or until soft and a bit limp.  While chiles are boiling place garlic cloves in a frying pan with a little oil and fry till browned.  Set to the side.  Once chiles are boiled remove from flame but DO NOT discard water… you will need it to blend chile.


You will have to work in batches.  In a blender add chiles (discard stem), browned garlic cloves, water from the pot the chiles boiled in, vinegar, chicken bouillon, oregano, black pepper and tomatillos.  Blend until smooth about 1 minute.  Pour into a bowl.  Set to the side.


Here is my red chile recipe:

  • 1 – large onion peeled
  • 5 – garlic cloves peeled
  • 3 – ounces new mexico dried chile (I use Don Enrique)
  • 3 – ounces california dried chile (I use Don Enrique)
  • 1 – large dried pasilla chile (I use Don Enrique)
  • 3 – tablespoons salt
  • 7 – cups water

In a big pot add water, 2 tablespoons of salt, all chiles, onion, and garlic cloves. Bring to a boil.  Boil for 30 minutes. Water will turn dark brown.


Remove chiles and garlic cloves from water.  Discard onion.  Do not discard water, you will be using it in the next step.  Remove stems from chiles, then add to a blender along with 1 cup of water from the pot, garlic cloves, and a tablespoon of salt.  Blend for 2 minutes.


Once blended get a big bowl and add 1/2 cup of water from pot into the bowl, then take the blended chile and put through a strainer. It will be thick.  Add a little bit of water from pot to chile strainer and scrape with a spoon.  Use up to 1 3/4 cups of water for the entire process. It’s time consuming but your red chile will be clean and super tasty.  Set to the side.


A hundred hugs to my crew for all the hard work we put in together!  A special thank you to the Idaho Potato Commission for believing in us! Thank you to the Zardeneta Family for being the best! xoxoxox! Love you guys and Merry Christmas!

Webisode 4: Picadillo

Webisode 4: Picadillo

Welcome to September, National Potato Month and Latino Heritage Month.  I am a proud Latina who loves to eat papas and found this to be the perfect time to have my celebratory hat on for this Picadillo recipe.  It is a dish my family has cherished for years and now I am proudly sharing it with you. Watch the video for a quick how to, and if you like what you see….. subscribe to my You Tube channel by clicking here.

Ingredients for Picadillo:

3 – anaheim chiles

2 – huerito chiles

3 – Idaho Potatoes

2 – medium sized tomatoes

1 – yellow onion

2 – pounds ground beef (70/30)

1 – teaspoon Lawry’s seasoning salt

1/2 – teaspoon ground cumin

1 – teaspoon black pepper

a pinch of oregano

4 – garlic cloves

1 – cup beef broth

Char chiles on a comal (grill) until skin is completely burned. Then place in a ziplock bag to soften in their own moisture for about 30 minutes. Remove from bag and peel charred skin completely off. Then slice and chop chile. Set to the side

Peel, chop into big cubes, and boil Idaho Potatoes for 10 minutes. Drain and set to the side.

In a large frying pan over a medium high flame add 2 tablespoons of oil and allow to get hot for about 3 minutes. Then add in boiled potatoes and fry until crisp and golden brown for about 10 minutes. Once your potatoes are nice and crisp add in your chopped chiles, chopped tomato and onion. Let all the veggies get to know each other by cooking them for about 5 to 7 minutes. Set to the side.

In a different large frying pan over a medium high flame cook ground beef. Make sure to break up the beef into small pieces…. then add in the spice with Lawry, cumin, black pepper, oregano, and garlic. Cook until all ground beef is brown. If there is an excess of oil in the pan, now would be the time to drain most of it. Then add in potato mixture and beef broth. Cover pan with lid and lower flame to a simmer. Let picadillo simmer for 20 minutes. Serve hot with a corn or flour tortilla and let your meat and potato dreams come true.

Thank you with my entire heart and gratitude to my amazing crew! I Love you guys.

Directors:  Mando Lopez and James Ford
Director of Photography:  Tony Molina
Producer:  Lacey Reilly
 Editor:  James Ford
Set Design:  Mando Lopez
Still photos and camera assistant :  Max Azpiazu
On-set morale booster: Kristen Warren
Sound:  Evan Kendra
Equipment: Paul Hopkins
Opening Music: Anger Bros
Musicians: Andrea Bulletti and Mando Lopez
Vocals: Nicole Presley
Music Engineer: Manny Nieto
Disclosure: This post is sponsored by Idaho Potato Commission. The recipe and opinions are my own. 
Webisode 2: Egg Roll Recipe.

Webisode 2: Egg Roll Recipe.

I’m thankful to be able to share this second webisode with you.  It was certainly a labor of love and we (my crew and I) are more than thrilled with the outcome.  Enjoy yourself some egg rolls!

A BIG BIG SPECIAL THANK YOU to my KICK A** CREW! I LOVE YOU GUYS!
Directors: Mando Lopez and James Ford
Producer: Lacey Reilly
Director of Photography: Tony Molina
Editor: James Ford
Set Design:  Linda Sena
Equipment: Paul Hopkins
Eggroll costume: Kristen Warren
Music: Anger Bros
Photos: Luz Gallardo
Make- up/Nails: Janine Presley

A photo of the crew and I after the webisode wrapped at 3:00 in the morning.

From Left to right: Ford, Janine, Myself, Mando, Lacey, Kristen, and Tony.

My egg roll recipe was originally featured on Nibbles and Feasts and still lives there. Click here for the printed recipe! 🙂

Webisode 1: Chile Relleno Recipe

Webisode 1: Chile Relleno Recipe

Greetings!  I’m so excited to share my very first webisode with you!  This is numero uno of many, many more to come.  Sit in a comfy place cuz this is a 15 minute instructional recipe.  Meet Flavio the Bolillo and watch me cook up one of my specialties…. Chile Rellenos!

Ingredients for chile rellenos:

6 – anaheim chiles
vegetable oil
onion
garlic cloves
huerito chile
flour
black pepper
oregano
Lawry’s seasoning salt
garlic powder
tomato sauce
water
El Pato
Jack cheese
a dozen eggs

A big thank you to my crew…. we made it through the heat! 

Director: Mando Lopez and James Ford

Producer: Lacey Reilly

Director of Photography: Tony Molina

Editor: James Ford

Color Correction:  Eric Johnson

Set Design:  Linda Sena

Equipment: Paul Hopkins (Thx!)

Music: Anger Bros

Photos: Luz Gallardo

Make- up/Nails: Janine Presley

Necklace designed by: Lisa Rocha