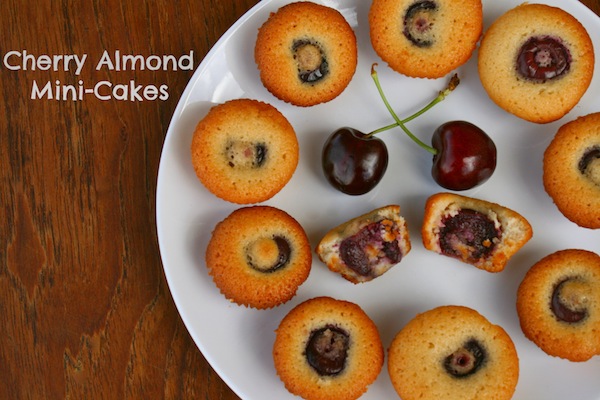
Cherry Almond Mini Cakes
Some things are sooooo good, they should only come in small bites. It leaves you wanting more but gives you the opportunity to nibble on a delectable piece of sweetness and not have the guilt that goes along with eating a huge piece of dessert. These beyond heavenly cherry almond mini-cakes are in a category all their own, and could be enjoyed after dinner as a mini dessert or perfect for a classroom of children. ENJOY!!!!!!
Ingredients for Cherry Almond Mini-Cakes:
- 10 – tablespoons of butter
- 7 – ounces of almond paste
- 1 – cup sugar
- 1- cup flour
- 1/2 – teaspoon kosher salt
- 5 – egg whites
- 1 – teaspoon vanilla
- 1/2 – teaspoon almond extract
- 32 – Melissa’s Produce cherries (pitted)
- 32 – mini cupcake holders
Directions:
- In a small sauce pan over a low flame melt butter. Stir every so often until butter is slightly browned. Remove from heat and place to the side to cool for 15 minutes.
- In a mixer add almond paste and mix on medium speed to break up paste for 5 minutes.
- In a medium bowl add sugar, flour and salt and mix together. then add to the almond paste and continue to mix for 3 minutes. Until most of almond paste is incorporated. If you see that some pieces of almond paste are much bigger then others. Stop the mixer and break them up with your hands, by grinding your fingers together to form small grains of almond paste.
- Then pour browned butter into almond paste flour mixture, and mix till combined.
- Add in egg whites, vanilla extract, and almond extract. Mix on medium for 3 minutes. Then turn mixer off and let dough rest for 30 minutes.
- Preheat the oven for 400 degrees fahrenheit. Line mini cupcake tins with paper liners and set to the side. Pit the cherries and set to the side.
- Fill each paper liner with 1 tablespoon of almond paste batter, then stick a cherry in the middle of each cup.


- Bake for 14 minutes. Then remove from oven and allow to cool for 15 minutes.
- ENJOY!