Category: Crafty Food

Food Craft: DIY Box Of Chocolates For Valentine’s Day

Food Craft: DIY Box Of Chocolates For Valentine’s Day

DIY-box-of-chocolates-Valentines-day My fiancé is very vocal about his likes and dislikes with everything, in this case, candy.  He is always disappointed with the boxes of chocolates that are store bought.  I can tell you exactly what candy he’ll eat and which he will complain about.  He looks inside the box takes a nibble out of a few pieces then puts them back.  Yeah, he’s that guy.  I guess I’ve gotten use to it, or I just throw them out or eat around the half eaten pieces.

As Valentine’s day approaches I’ve been thinking about chocolates and all the things my fiancé really does love….then I thought that I should just chocolate dip all his favorite treats. I’ll include savory, tart and sweet and create my own assortment of chocolate bites. I could recycle Valentine heart boxes from years past and spruce them up with a new lining. He’ll be so surprised and pleased.  That’s exactly what I did.

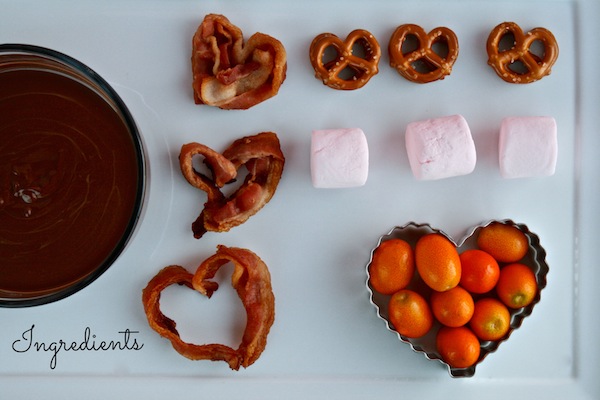
I started the project by heading to Walmart to pick up Valentine tissue paper (for the inside of my recycled boxes), stick glue, chocolate chips, marshmallows, and BACON!  If I was going to make my own box of chocolates it would have to have heart shaped bacon in it.  He lives to eat bacon so why not cover it in chocolate?

heart-shaped-bacon
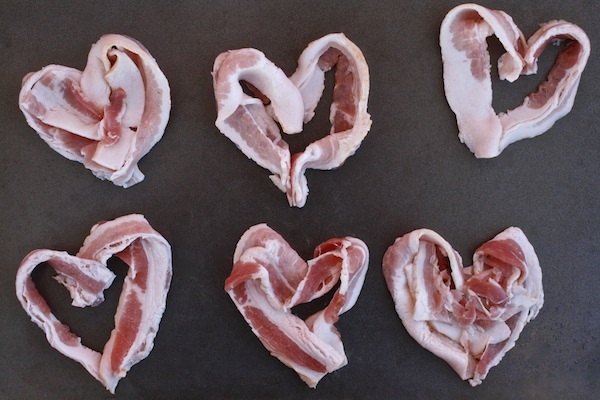
It was a real easy process.  I just shaped a few slices of bacon into hearts on a cookie sheet and baked them for 15 minutes at 400 degrees.  The rest was super easy and I believe he is going to be thrilled.  You can always custom make your own DIY box of chocolates with the treats your sweetheart loves most.

Happy Valentine’s Day!

Ingredients-for-box-of-chocolates

Things needed for DIY box of chocolates:

  • A heart shaped box ( I used a few I had from years past)
  • Valentine tissue paper
  • pencil and scissors
  • 2 – cookie sheets
  • wax paper
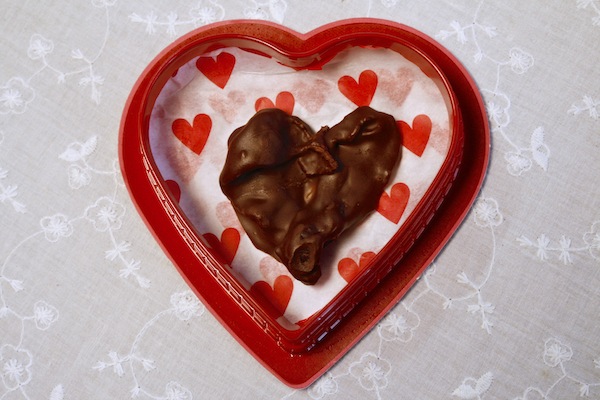
  • 1 – package bacon (shape each slice into a heart on a cookie sheet and bake at 400 degrees fahrenheit for 15 to 20 minutes)
  • 1 – paper towel
  • 1 – paper plate
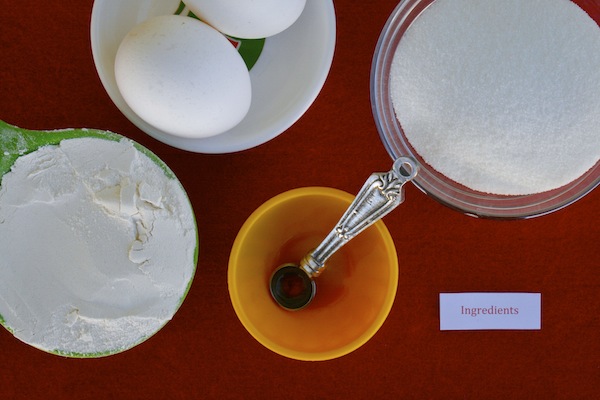
  • 1 – bag of semi-sweet chocolate chips
  • 1 1/2 – tablespoon coconut oil
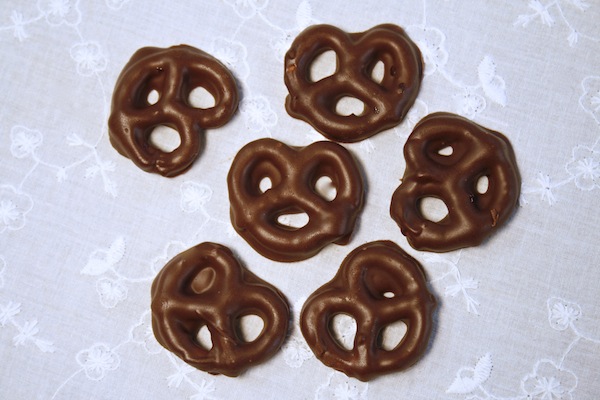
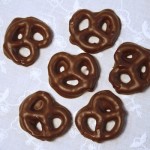
  • mini pretzels
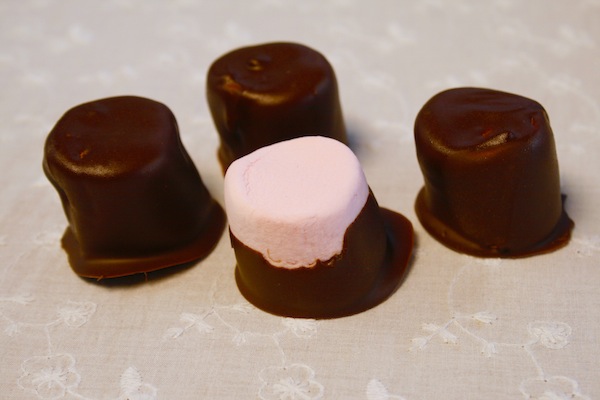
  • strawberry marshmallows ( I used Kraft)
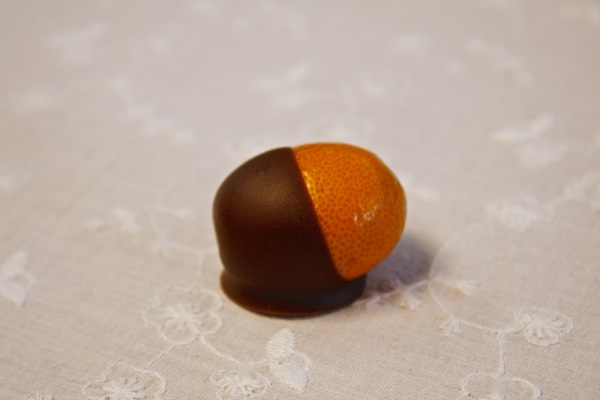
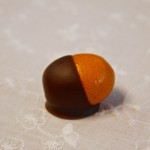
  • kumquats (I used Melissa’s Produce)

Directions: 

  1. Place a piece of tissue paper into the inside of a heart shaped box.  Then with a pencil lightly trace the outline of the inside of the heart.  Next remove the paper and cut it out with the scissors.  Place the heart on the bottom layer of the box. tissue-paper-lined-heart-box
  2. Line a cookie sheet with a piece of wax paper and set to the side.
  3. Preheat oven to 400 degrees fahrenheit.
  4. One the other cookie sheet shape each slice of bacon into a heart, and bake for 15 to 20 minutes (as pictured above).
  5. Remove bacon from oven and place on a paper towel lined paper plate to cool completely.
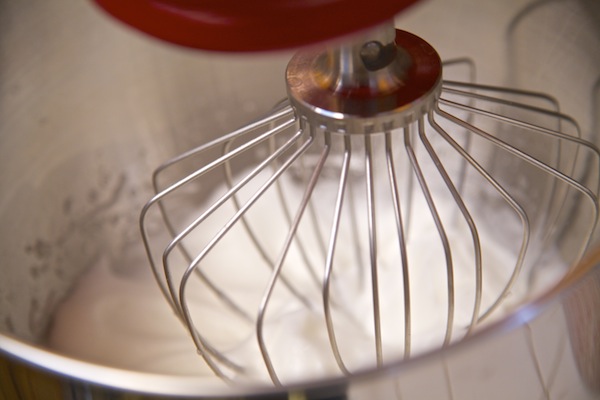
  6. In a double boiler add in chocolate chips and coconut oil, mix until completely melted.  Pour melted chocolate into a bowl.
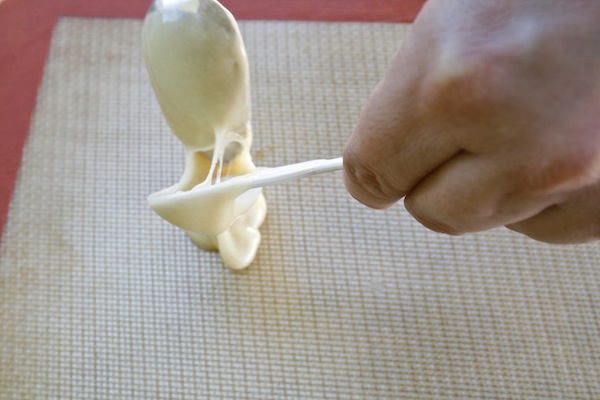
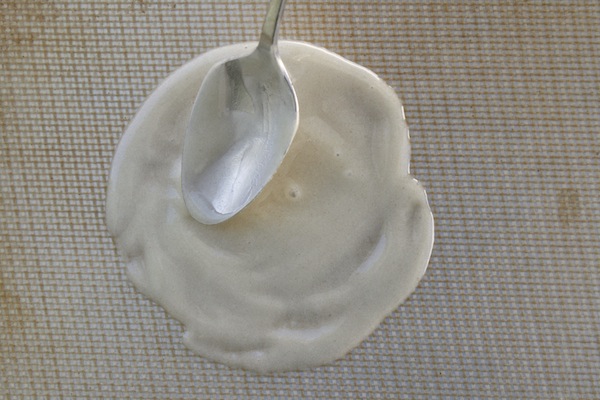
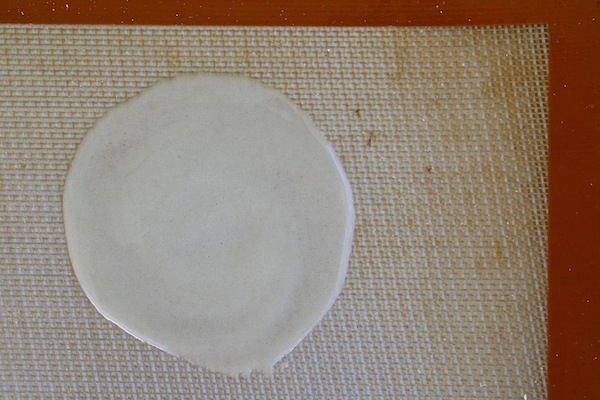
  7. Dip in pretzels, marshmallows, kumquats, and bacon.  Place dipped pieces on wax paper lined cookie sheet to firm up completely.  I let them set over night. chocolate-dipped-pretzels    chocolate-covered-kumquats    chocolate-covered-strawberry-marshmallows
  8. Once all pieces are firm, place chocolates into boxes, and give it to your sweetheart.  Valentine-chocolates
  9. Happy Valentine’s Day!

Walmart-Mom2-Disclosure2


Food Craft: DIY Fortune Cookies

Food Craft: DIY Fortune Cookies

Fortune-cookies

Recently I was out having a Chinese dinner with my family and at the end of the meal the waiter brought us a plate full of orange slices and fortune cookies.  I quickly grabbed the cookie closest to me and busted it open to get my fortune. I could see the little piece of paper on the inside of the cookie sparked the interest of my four year old son who is obsessed with reading. I turn my attention to him and started explaining to him what a fortune cookie was. Then he asks me “Can we make some at home?” Before I could answer, my fiance says “No, you can’t make those kind of cookies at home, they only make them in a factory.” Then my son says “Why not? Do you have to cut them out with scissors?” I thought about it for a second trying to figure out what he meant by the scissors question , did he mean the shape? Then I realized what he meant and answered him “Yes, you have to cut the paper to go inside the cookie with the scissors, it’s a craft.”

A few days later I was at Walmart looking around in the craft section and came across the scissors. I thought I should buy my son some kid scissors so he could practice cutting paper (like he’s learning in school) at home. I ask him “Do you want some little scissors to cut paper?” Then his eyes lit up, and he says “To make fortune cookies?” I thought to my self this is going to be one crazy project / food craft, but why not? I looked into his eyes and said “Yes, let’s get all our supplies right now, and we will make them as soon as we get home!” That’s exactly what we did. Who needs a factory? Do It Yourself!

Ingredients-for-fortune-cookies

Ingredients for fortune cookies:

  • 2 – egg whites
  • 1/8 – teaspoon almond extract
  • 1/8 – teaspoon vanilla extract
  • 1/8 – teaspoon salt
  • 1/2 – cup flour
  • 1/2 – cup sugar

Directions:

  1. Preheat the oven to 400 degrees fahrenheit.
  2. Place a baking mat on a cookie sheet and lightly spray with a non stick baking spray. Set to the side.
  3. Write or print a few fortunes or messages on a piece of paper. Then cut them out and place them in a dish. Set to the side. fortune-labels-for-cookies
  4. In a mixer add in egg whites and almond and vanilla extract. Mix on high until egg whites are stiff. Egg-whites-whipped
  5. In a separate bowl sift the salt, flour, and sugar together. Mix well to combine.
  6. Add the flour/sugar mixture to the egg whites. Mix well to combine.
  7. Use a teaspoon, and pour it onto the baking sheet. a-teaspoon-of-fortune-cookie-batter
  8. With the back of a spoon make it into a 3 to 4 inch circle. Make one cookie at a time to begin with because it is hard to get the timing right with more then two. You need to fold the cookies fast or they will break and not work. Start with one and see how many you can make. spread-cookie-on-baking-mat   _MG_0530
  9. Bake cookie for 5 minutes. The edge should be golden and the inside pale.
  10. Take it out and quickly remove the cookie from the mat with a spatula. _MG_0604
  11. Then place a fortune in the middle. fortune-in-middle-of-cookie
  12. Next fold the cookie over so both ends meet. Folding-fortune-cookie
  13. Last fold the cookie over the rim of a mug. fold-over-the-rim-of-mug
  14. Place the cookie down to cool completely.  _MG_0547
  15. Make the next one. This recipe made almost 2 dozens.
  16. Eat This Now! Fortune-cookies-chinese-new-year

Walmart-Mom2-Disclosure2

Hot Chocolate Cubes

Hot Chocolate Cubes

Hot Chocolate Cubes

Are you getting ready for the holidays? I like to cozy up to a nice cup of hot chocolate every time the moment presents itself. Just got home from holiday shopping at Walmart? A cup of hot chocolate. Gonna decorate the tree? A cup of hot chocolate. Baking cookies? A cup of hot chocolate. Christmas morning? You get the picture. My grandfather always sipped on a cup of hot chocolate during the holidays growing up and I followed suit, except this year I wanted to make it more interactive for my son, and possibly give my hot chocolate away as a gift. I thought “how can I transform that holiday magic from my cup into gifts for my family and friends?”  I decided to make hot chocolate cubes, that could be stirred into a cup of hot milk, and or be eaten as a lollipop. Wrap them up and tie them with a bow.

Ingredients for hot chocolate cubes:

  • Chocolate chips or pieces (semi sweet, milk chocolate, dark chocolate, or white)
  • Silicone ice cube tray
  • mini marshmallows
  • candy cane sticks
  • christmas sprinkles
  • lollipop sticks

Hot Chocolate Cube Ingredients

Directions:

  1. In a double boiler melt chocolate. (If you don’t have a double boiler: place water in a pot over a high flame then place a metal bowl over the boiling water in the pot and put the chocolate in there, stir till melted.)Melted-chocolate
  2. Pour melted chocolate into silicone ice trays (fill 3/4 of the way up) and place in the fridge for 25 minutes. Pour Into the tray
  3. Remove from fridge and insert candy cane sticks, decorate with marshmallows, sprinkles, and for the cubes without a candy cane stick insert a lollipop stick. Decorate Chocolate_MG_0358Insert-candy-cane
  4. Place back in the fridge for 2 hours.
  5. Remove from fridge and let sit for 5 minutes, then carefully push them out of the silicone ice cube tray. chocolate-cubes
  6. If you wrap them up they work great…gift-wrapped-chocolate-cubes
  7. Or stir one into a cup of hot milk and embrace the warm chocolate beverage.  They’re great for coffee as well. hot-chocolate-cup
  8. Enjoy!

Walmart-Mom2-Disclosure2

Food Craft: How To Build A Candy Christmas Tree

Food Craft: How To Build A Candy Christmas Tree

xmas

Here’s the skinny… My mom and Auntie Rosie have been on a crafting roll lately…. Every time I check in with my Mom she goes on and on telling me about the candy wreaths her and my aunt have been making, if that’s not enough she’s even sending pictures and blowing up my instagram feed with her crafty creations. I have to admit…. I was a little jealous I couldn’t join them due to an over abundance of work this year. Usually I’m in the thick of the craft projects with them.

A few days later my Mom and I were doing our weekly run to Walmart for all things needed, and she says to me “Are you sure you don’t have time to make a candy tree? We could buy everything here at Walmart, then go home and make some. It won’t take that long.” I got so happy, I smiled and said “Alright. Twist my arm to spend some quality Mom and daughter time making food crafts!” She new I was bummed and was dying to get crafty…. plus I knew I could always share / blog about it.

Once my tree was done, I thought it to be so whimsical and old fashioned at the same time. I imagined it being part of the set of an old Rudolph cartoon with a blaze of snow blowing past it. My Mom and I placed our trees side by side when we were done and photographed them. She made her’s covered in gummy bears and I made mine of sour cherry candies with a white star on top. HAPPINESS = A MERRY CHRISTMAS

_MG_0005

What you’ll need for a Candy Christmas Tree:

  • glue sticks
  • glue gun
  • styrofoam cone
  • styrofoam circle stand / base for cone (optional)
  • green tape (or any other color that suits your needs)
  • candy
  • sequins ribbon (optional)
  • craft stars
  • garland / tinsel
  • scissors

Instruction:

  1. Plug in glue gun and insert glue stick…allow to get hot.
  2. Glue base/stand to styrofoam cone.  _MG_0013_MG_0017
  3. Working in 2 to 3 inch long pieces, cover the cone from top to bottom in tape. _MG_0022
  4. Once the entire cone is covered, tape up the bottom and top too.
  5. Using little dabs of glue from the glue gun, stick on the first piece of candy. Work your way all around to form the first ring. _MG_0032
  6. Then measure the circumference of the tree with the sequin ribbon. Cut where the two ends meet and glue it on between each roll of candy rings. _MG_0036
  7. Once you reach the bottom glue the garland / tinsel around the bottom of the base. _MG_0039
  8. Either glue the star directly on top of the tree or I used pom pom balls between the tree and the star.
  9. It’s that simple.
  10. Enjoy!

Walmart-Mom2-Disclosure2

Thanksgiving Rice Krispie Turkey Treats

Thanksgiving Rice Krispie Turkey Treats

HappyTurkeyDay2

Yes, I have been known to tag along with my Mom every where she goes, and she loves to go to Walmart. Every Monday, like clockwork she makes her Walmart grocery run, and I come along and pick up the items I need too. This past Monday as we were driving, I was saying I wanted to do some kind of edible Thanksgiving craft with my son. The craft would serve as an introduction to the holiday and somewhat explain to him what the feast represents in the simplest form. My Mom asked what I was going to make, and I told her I would probably make some type of rice krispie treat since I know that is something he will definitely eat. Sometimes a food craft is the best way for me to teach my 4 year old the joys of the holidays. That’s the exact method my Mom and Aunts taught me with.

Enjoy your Thanksgiving holiday and make this cute little craft with the kids before the feast. It also would be a fun activity for the kids to partake in after the holiday dinner. Keep them busy decorating their own dessert. 🙂

_MG_0049Ingredients for Thanksgiving rice krispie turkey treats:

  • 3 – tablespoons butter (plus a little extra to rub on your hands)
  • 1 – package (10 ounces) jet-puffed marshmallows
  • 6 – cups rice krispies cereal
  • frosting or royal icing
  • pretzel sticks
  • colorful licorice
  • candy corn
  • edible candy eyes

Directions:

  1. In a large pot over a low flame add in butter and stir until melted.
  2. Add in marshmallows.
  3. Stir until completely melted. Remove from flame.
  4. Stir in the rice krispie cereal in until completely coated. 1-4Stuff
  5. Butter your hands, and spray a 1/2 cup measuring cup with non stick spray.
  6. Fill the measuring cup with the warm cereal mixture.
  7. Shape with your hands to form a ball. Repeat till all cereal mixture is gone.
  8. Place cereal balls on a baking mat or lined cookie sheet. 5-6Stuff
  9. Allow to cool for about 30 minutes.

Let’s Decorate:

First start by sliding pieces of licorice onto a pretzel stick. Leave about 1/4 of an inch at the bottom of the stick exposed. This will be the part that you stick into the rice krispie treat ball to form the feathers of the turkey.

_MG_0101_MG_0105


Once all licorice feathers are in place in the back of the turkey body, it is time to work on the face. Using frosting or royal icing stick a candy corn into the front center of the ball. Then stick two candy eyes about the candy corn.

_MG_0110_MG_0116


I also added two candy corn to the bottom as feet and two to the side as wings. There are no rules….. Have fun with your turkey!

Gobble

Walmart-Mom-Disclosure