Month: April 2014

Samsung GALAXY S 5 Phone Review and Fish Tacos!

Samsung GALAXY S 5 Phone Review and Fish Tacos!

fishTac I was recently asked by Walmart to review the new Samsung Galaxy S 5 phone.  Being a food blogger, the first thing I look for in a phone is how good the camera works because of the nature of my job.  I have to take many photographs of food and Instagram them or Facebook or Twitter.   I’ll also write quick reviews of different foods I’ve just tasted or of restaurants I’ve just eaten at.  Also because I’m constantly on the go, I’ll write posts for my blog directly from my phone from wherever I am.  There’s a lot of pressure for my phone because essentially, I live and die by it.

First off, the 5MP camera for the Samsung Galaxy S 5 is amazing, with a resolution of 800 x 480 (16 megapixels), I’m able to take strikingly awesome photos. I also love the screen size.  It’s 4 inches from corner to corner so I could see everything clearly. The extended room on the face is also perfect to write in my documents and move different apps around without them getting jumbled up together.  IMG_0459
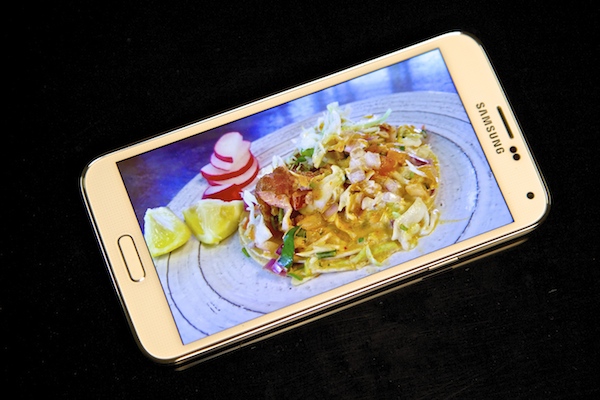
The actual look of this water-resistant phone is sleek, clean and very simple.  At 9.9mm thin, it’ll have minimal impact on the back of your pant pocket.  Another one of the many cool features is that it has a built in heart-rate monitor so you can see what’s going on with your old ticker while you exercise!

But let’s face it, the best way to test anything out is to have a go at it in your everyday life.  That is exactly what I did this past weekend with this helpful phone.  I made fish tacos (recipe below) on Saturday and had a blast with my family all over my beloved city of Los Angeles.

Oh, how are my fish tacos?  They rock.

Ingredients for baja-style fish tacos:

  • 2 – pounds white fish
  • Salt and pepper (to taste)
  • 1 1/2 – cups flour
  • 1 – teaspoon baking powder
  • 1 – teaspoon Lawry’s seasoning salt
  • 1 – teaspoon garlic powder
  • 1/4 – teaspoon cumin
  • 1 – egg
  • 1 – bottle Mexican beer ( I used Modelo)
  • Vegetable oil (about 3 to 4 cups)
  • Corn tortillas

Ingredients for garnish:

  • avocado
  • lime
  • cabbage (thinly sliced)
  • radish
  • cotija cheese
  • Mexican crema
  • Red or green salsa

Directions:

1. Wash and cut the fish into 2 inch pieces.

2. Pat dry the fish with a paper towel, then lightly season fish with salt and pepper.

3. In a large bowl add in flour and baking powder.  Then the Lawry’s garlic powder and cumin.  Mix to combine.  Pour in egg and beer.  Whisk until batter is no longer clumpy.  Set the batter to the side to rest for 10 minutes, then it’s ready.

4. Place fish pieces into beer batter.  Mix to combine well.

5. In a pot add vegetable oil over a medium flame.  Allow to get hot. Using thongs add in one piece of battered fish at a time.

6. Deep fry for several minutes or until golden brown. Oil will bubble, and once it starts to    calm down a little the piece is golden and crispy.

7. Place all crispy fish pieces on a paper lined plate to drain.

8. Heat the corn tortillas, fill with crispy cauliflower pieces, and garnish as you desire.

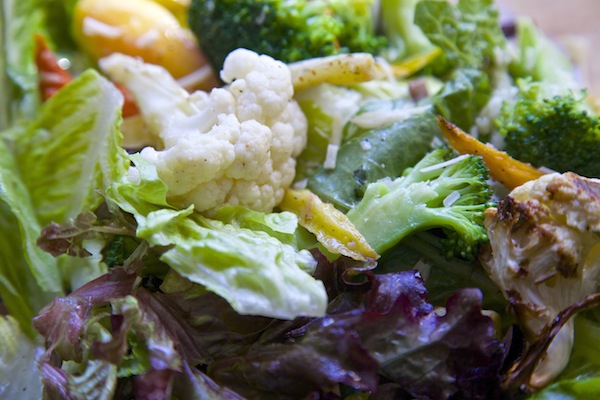
                      My weekend in pics with the Samsung GALAXY S 5: 20140429_152101 20140425_16414820140427_12533320140427_13412920140427_145322

20140429_15051320140425_162914 20140427_134157 20140427_145232 Walmart-Moms-Disclaimer.2013

Asparagus Pork Fried Rice

Asparagus Pork Fried Rice

steaming bowl of asparagus and ham fried rice

It seems to me that I crave fried rice once every two weeks, and have to run out to my various Chinese spots that I frequent to get it, and every time I’m there placing my order, making sure to repeat “extra egg on the rice please” to ensure they make it exactly the way I want it, I think to myself “Why don’t I have a rice cooker so I could make my own fried rice?” I know you’re probably thinking “Why the rice cooker for fried rice?” Here’s the answer…. The best fried rice is made with day old rice that is sticky and made in a rice cooker. Plain and simple. And why has it taken me so long to own one? Oh I know, because I have a clutter of junk in my kitchen cabinets that I need to get rid of, in order to make room for new stuff…. that’s why. Oh the vicious cycle of making time to get my life in order! Let’s spring forward.

Last week I just about had it, I reached into one of my cabinets and some old plastic cups came tumbling out, my kitchen was seriously long overdue for a spring cleaning. I grabbed a step ladder and climbed up into my chaotic cabinets and started to get rid of what was no longer needed. I began by taking everything out of the cabinets so I could scrub them down. Then before putting all the wanted items back in, I thought it would be nice to line the bottoms with con-tact paper. I threw on a poncho and off to Walmart I went to get my con-tact paper.

My Walmart is set up where you go through the market area first in order to get to the rest of the store. As I strolled in I couldn’t help but eye the produce as I passed it. There was a big display of asparagus, and it just looked so green and fresh. I started to think “I need asparagus for dinner tonight. Awwww, asparagus would be divine in a fried rice with ham.” My mind continued to wander “I have ham in the fridge leftover from Easter, I could buy that asparagus and make fried rice. No, you can’t, you don’t have a rice cooker.”

Low priced asparagus at Walmart

Before my mind had made the conscious decision to do anything, my body was already in motion. The asparagus was in the cart, I was headed to the appliance aisle because I knew with my new spacious cabinets in order I would have plenty of room for a rice cooker. The dreaded spring cleaning that I had procrastinated on for so long ended up being a godsent.

ingredients for asparagus ham fried rice

Ingredients for asparagus ham fried rice:

  • 2 – tablespoons vegetable oil    Nishiki-rice-walmart_MG_0109
  • 1 1/2  – cups ham (cubed small)
  • 1 – cup onion (sliced)
  • 2 – cups asparagus (cut into pieces)
  • 4 – cups steamed rice (I used Nishiki)
  • 1 – tablespoon butter
  • 3 – eggs (whisked in a bowl)
  • 4 –  green onion (sliced & chopped)
  • 1/2 – tablespoon soy sauce
  • 1 – tablespoon sesame seeds
  • 1 – teaspoon nanami togarashi (optional)

Directions:

  1. Make a pot of rice in rice cooker according to directions in the manual. Make a total of 4 cups. Place rice in the fridge over night or until ready to use. 1 day old rice works best for this recipe.
  2. In a large frying pan over a medium high flame add 2 tablespoon vegetable oil and allow to get hot.
  3. Add ham to pan. Fry until ham is crisp, about 4 minutes.
  4. Add in onion and asparagus mix well.  Continue to fry for 3 minutes or until asparagus turns a bright green color. frying ingredients before rice enters pan for fried rice
  5. Add in the rice, with a spatula break up the rice, and mix into the onion asparagus mixture.
  6. Once the rice is combined lower the flame to a simmer. added rice for fried rice
  7. In a separate small pan over a medium flame add butter and allow to melt.
  8. Add eggs to melted butter and fry up the eggs. Scrambled egg is the end results.
  9. Add the cooked egg to the rice. Adding egg to fried rice
  10. Sprinkle the rice with green onion, and soy sauce. Mix well to combine.
  11. Lastly sprinkle with sesame seeds and if some spice is desired nanami togarashi.asparagus ham fried rice with chopsticks
  12. Enjoy!

a great priced rice cooker found at Walmart

Walmart-Moms-Disclaimer.2013

Cajeta Neapolitan Ice Cream Sandwich Cake For The Premios Billboard 2014 Awards

Cajeta Neapolitan Ice Cream Sandwich Cake For The Premios Billboard 2014 Awards

This post is sponsored by Sprint.
creamy cajeta on top of a neapolitan ice cream sandwich cake

The other day I happened upon an ice cream sandwich cake on the internet. It looked so good and tempting. I don’t know why, but it just had my name written all over it. Maybe it has something to do with the bloodmoon, or pms, or maybe the odd warm weather…. whatever the reason…. I wanted it.

46253_Premios Badges-FINAL3As I examined the chocolate sauce dripping down the sides of the cake (my current obsession), I thought to myself  “I bet that would be heavenly with cajeta, and neapolitan ice cream sandwiches instead.” In that instant all the pieces came together. This coming Thursday (April 24th), I will be hosting a #Billboards2014 party here in my home with my #Framily on behalf of Sprint, and a cajeta neapolitan ice cream sandwich cake would be the perfect dessert for us. Plus the ice cream sandwich is sort-of  in the same shape as the new Samsung Galaxy 5S, and guess what? Sprint is giving me the new phone to give to one of the members of my #Framily. Oh it’s gonna be a fun night.  We plan on watching the awards, playing games, snacking, and eating cajeta neapolitan ice cream sandwich cake.  Don’t forget to follow the conversation on both instagram and twitter…. we will be using the #Framily and #Billboards2014 hashtags!

Ingredients for cajeta neapolitan ice cream sandwich cake:

  • 12 – neapolitan ice cream sandwiches
  • 1/2 – cup cajeta
  • 2 – cups whipped cream
  • optional: fresh strawberries

Directions:

  1. Lay 3 ice cream sandwiches on a plate. ice-cream-sandwich
  2. Drizzle 2 tablespoons on cajeta on top of sandwiches. cajeta-neapolitan-ice-cream-sandwiches
  3. Place another 3 sandwiches on top of cajeta, with the sandwiches stacked in the opposite direction.
  4. Top with another 2 tablespoons of cajeta. double-stacked-ice-cream-sandwiches
  5. Top cajeta layer with 3 more sandwiches.
  6. Another two tablespoons of cajeta.
  7. Lay down the final 3 sandwiches.
  8. Frost the entire stack of sandwiches with whipped cream. Frosting-ice-cream-sandwich-cake
  9. Drizzle the remaining cajeta over the top of the cake and place back in the freezer for a minimum of 1 hour to firm. cajeta-drizzled-ice-cream-sandwich-cake
  10. Slice and Enjoy! sliced-neapolitan-ice-cream-sandwich-cake
Crispy Potato Encrusted Fish In A Zucchini Pepita Sauce Is Part Of Our New Idaho Potato E-book!

Crispy Potato Encrusted Fish In A Zucchini Pepita Sauce Is Part Of Our New Idaho Potato E-book!

Fish encrusted in potato for new #springpotatoes e-book

I love the crunch of crispy potatoes especially when used as a topper on a piece of alaskan cod.  This is one of the recipes I developed for a new e-book that I had the pleasure of co-creating with my pal Ericka Sanchez from Nibbles and Feasts. We teamed up with Idaho Potatoes to bring a delicious latin inspired Spring menu to life. Waste no time reading this post when you could be looking at our E-book! You will find this recipe along with 9 other in the book! Enjoy!

Potato-ebook-Picture

Muscat Grape And Watermelon Water: Agua De Uvas Y Sandía

Muscat Grape And Watermelon Water: Agua De Uvas Y Sandía

Disclosure: This post is sponsored by Whole Foods Market. The recipe and opinions are 100% my own. 

Ingredients for auga de uvas and sandia

There is no other way to describe this drink other than “Mmmmm, that’s good.” Those were the first words out of my fiances mouth as I poured him a tall sip. Let me rewind a little and tell you the back story. It starts with Muscat grapes. Have you ever tried a Muscat grape? The Muscat Grape is a pink seedless grape, with a very sweet and rich flavor. These grapes come all the way from Chile and range in color from light green to deeply blushed with pink (the ripest and best), with a softer succulent texture. Basically they are a dreamy grape that need to be adored. The tricky part is they are only available for a short time at Whole Foods Market in my lovely California, from now thru late mid-April. Okay, with those facts in mind I know that I am only able to appreciate their beautiful-ness for a short period of time. SO, the other day I was at Whole Foods Market buying some mangos and a pile of cheese when I spotted the muscat grapes. I made a serious bee-line for them and started to stock up. My fiance says “What? Why are you buying so many grapes?” I come back at him with “Well my Tia Brilla is in town and what if she wants grapes, and maybe we can freeze some and have as a healthy late night snack, and they taste great in salads, and I’ve been wanting to make agua de uvas.” He shook his head, and gave me a look like I was CRAZY! Until he tried them himself of course. Isn’t it always like that? I definitely threw some in the freezer, add a few to a salad I made over the weekend, served my Tia Brilla some during her visit, and made a big jug of agua de uvas y sandía. YUM! I highly suggest you stock up now, before it’s way too late.

Muscat grapes and watermelon water: Agua de uvas y sandía

Ingredients for grape and watermelon water:

  • 2 – pounds muscat grapes (seedless) (stem removed)
  • 8 – cups of chopped up watermelon (peeling removed)
  • 6 – cups water
  • 1/2 – cup sugar
  • 2 – limes (juiced)

Directions:

  1. Place grapes in blender with 1 cup water. You may have to do this step several times depending on the size of your blender.
  2. Blend until smooth.
  3. Pour grape blend through sieve and allow all liquid to pass through and fall into a pitcher. This step will collect all the skin from the grapes. You may have to scrape the inside of the sieve with a spoon to allow any remaining liquid to pass through. blended grapes poured into sieve
  4. Next blend all the watermelon. Again add a cup of water to the blender and this time add in the sugar. Blend till smooth.
  5. Pour watermelon blend through the sieve and allow it to fall into the same pitcher as the grape blend.
  6. Add in remaining water and lime juice. Mix to combine.
  7. Chill in fridge until super cold.
  8. Serve and enjoy!
Cheesy Garlic Bread Made With Mama Francesca Parm

Cheesy Garlic Bread Made With Mama Francesca Parm

 Disclosure: This post is sponsored by Mama Francesca Cheese. However all opinions and the recipe are 100% my own.

Cheesy garlic bread made with Mama Francesca Parmesan Cheese

I think I have confessed here on my blog before that my family and I split ways when it comes to Italian food. For some reason they need to be coaxed into eating it. I have decided to stop this crazy nonsense of me sacrificing the flavors I love for them to be happy, when in reality they absolutely love it. Instead I am going full force ahead and serving everyday meals laced with Italian flavors. For instance, I have been serving bubbly cheesy garlic bread fresh out of the oven MF_logo_premcheese_blackwith our dinners at night, and NO ONE can resist it, especially me. I can’t just say it is the inviting warmth of the hot bread, I have to give credit to the incredible parmesan cheese I’ve been using: Mama Francesca. The premium cheese has really taken a front and center spot in my home since discovering it at Walmart a few weeks ago. Did I mention the price point can’t be beat for a cheese of this caliber? It taste great and is being used at least twice a week, not only by me but by my fiance too (and he’s a tough sell.) I have even managed to work the lovely Mama Francesca parmesan into my homemade salad dressings. Okay, it’s  become a permanent fixture on my grocery list and I don’t foresee it coming down. When you find something this good, you just can’t imagine living without it.

I’m really looking forward to the new Mama Francesca “The Tereztto” which will be  launching in Wal-Mart on 4/21/2014! Another way for me to keep making my meals feel more Italian!

Ingredients:

  • 1 – loaf french bread
  • 3 – tablespoons butter (room temperature)
  • 2 – tablespoons mayo
  • 3 – tablespoons Mama Francesca Parmesan cheese
  • 2 – tablespoons minced garlic

Directions:

  1. Preheat oven to 375 degrees Fahrenheit.
  2. Take loaf of french bread and slice it down the middle (creating to long slices of bread.) French bread for garlic bread
  3. Place butter, mayo, parmesan cheese, and minced garlic in a bowl.  Mix to combine.ingredients for cheesy garlic spreadMixed ingredients for cheesy garlic bread
  4. Evenly spread butter/parm mixture on each slice of bread.
  5. Place slices of bread on a cookie sheet.
  6. Bake in the oven for 15 minutes.
  7. Then place under the broiler for 3 minutes or until golden brown. Sliced cheesy garlic bread
  8. Cut and enjoy with a hearty meal.

Mama-Francesca-Cheese


Pin It!

Tracking Pixel

Taking Small Steps Towards A Better Version Of My Family

Taking Small Steps Towards A Better Version Of My Family

Disclosure: This post is sponsored by Knowledge Universe. However all opinions and the recipe are 100% my own.

IMG_0051

It’s really an amazing gift being a Mom. I know we hear all these stories about being a parent before having children of our own and don’t really know how to gage it all. The truth is no book or movie or prior love could have prepared me for the flood of unconditional love I have for my own child, and that’s the easy part.

What get’s hard is trying to make sure all his needs are met, and met right. I want to feed him nutritious meals, give him the tools he needs to make solid decisions in the future, and make sure he is active to maintain good health. Those three tasks seem to carry the weight of the world if you think of them in the big picture frame. Instead of getting completely overwhelmed trying to do it all perfectly everyday. We (my fiance and I) take it one step at a time. These goals are not only put in place for him, but for all of us. We want to be around many years to play, guide our son through life, and enjoy all the invaluable moments life has to offer.

Recently I wrote a post about these goals and how I have teamed up with Knowledge Universe. Knowledge Universe is this great company that cares for 0ver 160,000 kids everday and have teamed up with Michelle Obama’s Partnership for a healthier America (PHA) to help battle child obesity. The goal is to help families make little simple changes  that could lead to a healthier lifestyle. That’s obtainable. Right?

Knowledge Universe which is the parent brand to KinderCare is celebrating their new Grow Happy campaign for better health at a April 15th Open House at all of their community-based child care and early education centers. Stop by for a tour and get free registration when you enroll! Offer good April 13, 2014 through April 20, 2014. Find a center near you here

8416_growhappy_logo_final (3)

Updates On Goals:

FOOD: We have definitely cut back in the sugar area. Since making this goal I have reduced our usually dessert making to one time a week (instead of 3 to 4 times a week). I have opted to give my son yogurt in place of ice cream or all natural fruit bars (that I make myself) as a way to reduce sugar. We have been able to stick to eating more vegetarian meals, and I have been eating more salads. My son is still working on coming around to liking salad, but it doesn’t mean I’m giving up. I have been trying different types of salads, the only one I have been successful with has been a delicious “Coconut Peanut Mango” salad (recipe coming to my blog soon), I’m guessing because it’s mainly made of fruit.

_MG_0045

BODY: My son is enjoying his swimming lessons, and he is almost summer ready. He has been to a few swimming parties in the last couple of weeks and is already showing his cousins the new stuff he has learned. I have been consistent in walking, dancing and pilates 3 times a week. We have been making time to spend more time at the park too. I have even started doing the hula hoop in my living room. For some reason my family thinks it’s the funniest thing in the world to watch me hula hoop, I don’t mind looking like a complete clown for a good laughing session. My clothes is already starting to fit me better. 🙂 Now to just keep it up!

IMG_0368 MIND: We have definitely been cooking together more often, and that is something I really enjoy. We also incorporated reading circle, this is something my son likes that he does at school so we figured we could do it here at home too. As far as games are concerned we moved to my son’s iPad instead of the conventional board game and have been battling each other in racing games or spelling games. I love this part of our learning together bond.

Our-Family

Family_only_lockup

Tracking Pixel