Recent Posts

Pillsbury Bake-Off And A Apple Raisin Cinnamon Knot Recipe

Pillsbury Bake-Off And A Apple Raisin Cinnamon Knot Recipe

Pillsbury Bake-off "bake it til you make it" banner

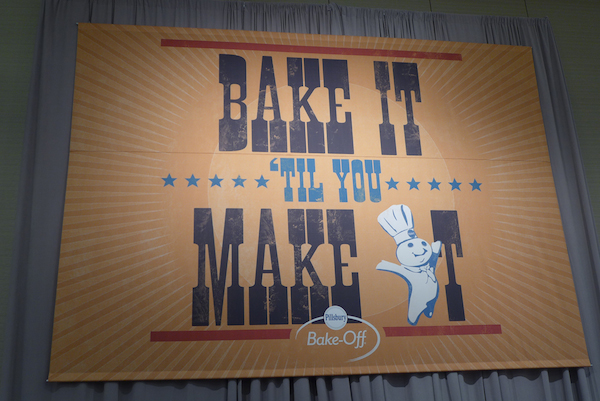
Talk about an ENERGY boost… I was in Nashville, Tennessee last week  to cover the Pillsbury Bake-Off. Lots of people assumed I was competing for the grand prize of One Million dollars, let me clarify right off the top I was not there baking, nor did I submit a recipe, I was there to cover the event for Que Rica Vida (General Mills- Latin division). I had always heard about the bake-off and have even caught a glimpse of it on T.V. , but to actually be there and feel the energy of the room and the tension of the competitive bakers was a completely different experience then I had imagined.

A behind the scenes look at all the contests in the Pillsbury Bake-off power supply

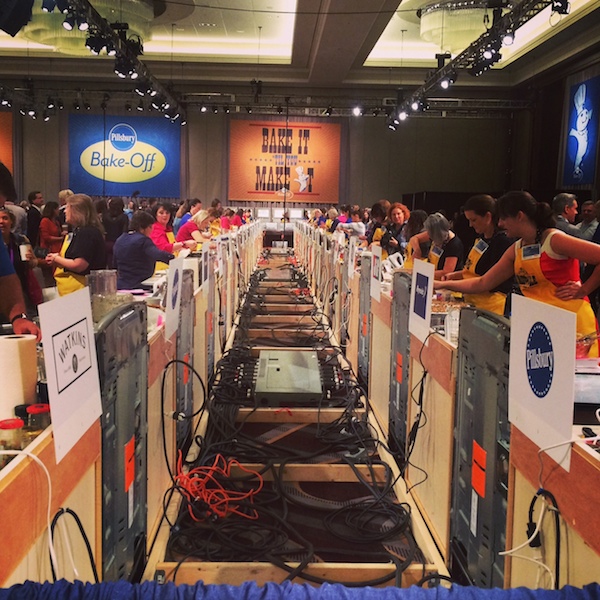
A lot of contestants have been submitting recipes for years and were there for the first time, and others are professional contest recipe applicants. This is a serious business for some especially when there is a million dollars at stake. It was interesting to watch and even more enticing to sample some of the finalist recipes. At the end of the four hour bake-off a panel of judges chose 4 finalist who are all vying for the grand prize. The announcement will be made on ABC’s The Chew Dec. 3rd. Do you want to help pick a winner? Vote here!

A Pillsbury contestant baking toward the prize. bake-off

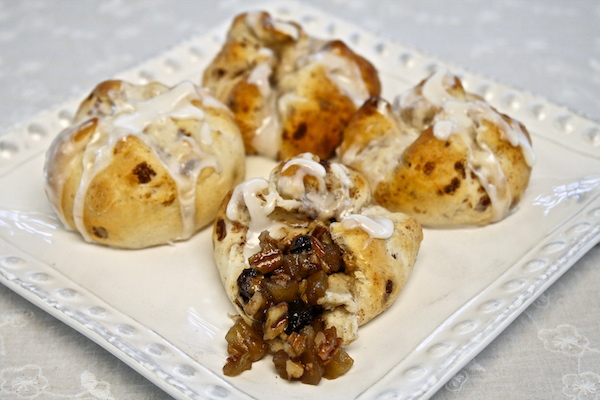
I left the bake-off so inspired by what I saw… it made me think what would I make with Pillsbury if I was in the competition. I would definitely enter under the breakfast category with these apple raisin cinnamon knots topped with a Eagle brand sweetened condensed milk glaze.

Apple raisins cinnamon knots topped with sweetened condensed milk

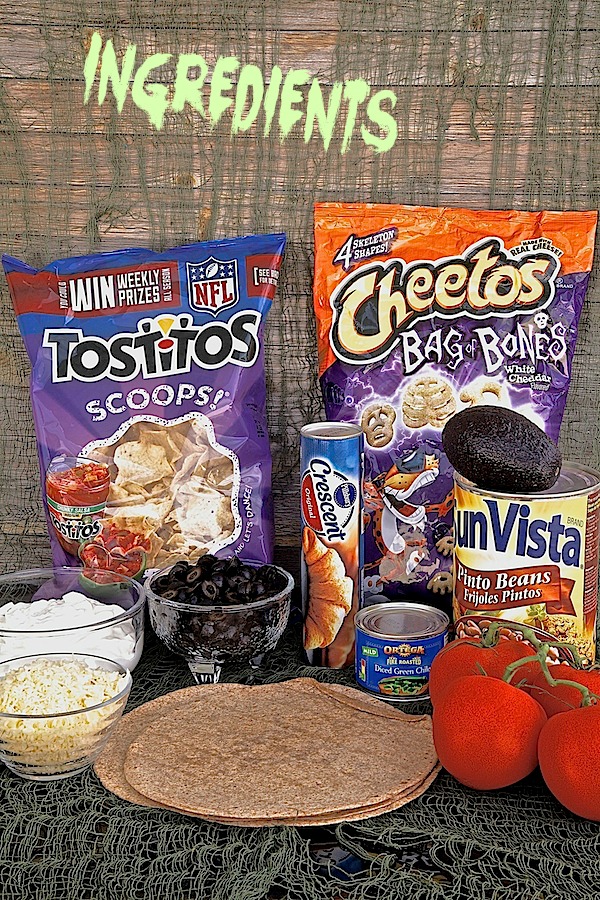
Ingredients for apple raisin cinnamon knots topped with Eagle brand sweetened condensed milk glaze:

  • 1 – tablespoon butter
  • 1 – piloncillo cone
  • 3 – small green apples (peeled, cored, and chopped into small chunks)
  • 1/2 – teaspoon ground cinnamon
  • 2 – ounces raisins
  • 1/2 – cup chopped pecans
  • 2 – 12.4 ounces of Pillsbury Cinnamon Rolls
  • 4 – tablespoons Eagle brand sweetened condensed milk

Directions:

  1. In a small sauce pan over a medium flame add in butter and allow to melt.
  2. Once melted add in piloncillo. Let piloncillo dissolve, then add in apples and stir to coat all the apples in the sugar syrup.
  3. Sprinkle with cinnamon, and continue cooking for 10 minutes.
  4. Add in raisins and mix them into the apples. Cook for an additional 5 minutes allowing the raisins to plump up.
  5. Remove from flame and mix in the pecans. Set to the side.
  6. Preheat the oven to 400 degrees Fahrenheit.
  7. Line a cookie sheet with a baking mat or wax paper and set to the side.
  8. Open Pillsburry cinnamon rolls and remove icing. Separate each cinnamon roll.
  9. Working with one at a time, get a cinnamon roll and flatten it out into a flat circle with either your hands or a rolling pin.
  10. Fill the center of the dough with 1 teaspoon of the apple raisin filling, then gather all edges of the dough to the top and pinch them together and twist. Creating a dumpling- like ball.
  11. Place on the cookie lined sheet and continue till done.
  12. Bake for 10 minutes.
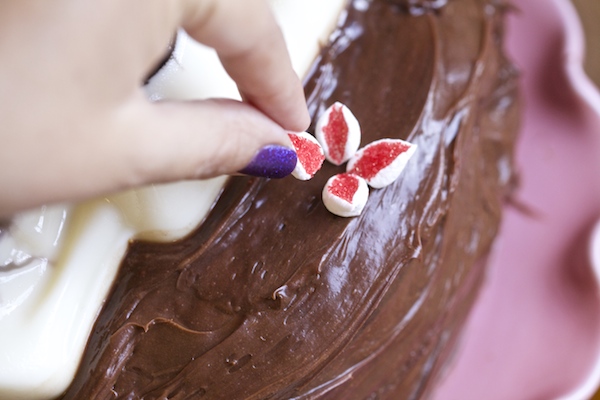
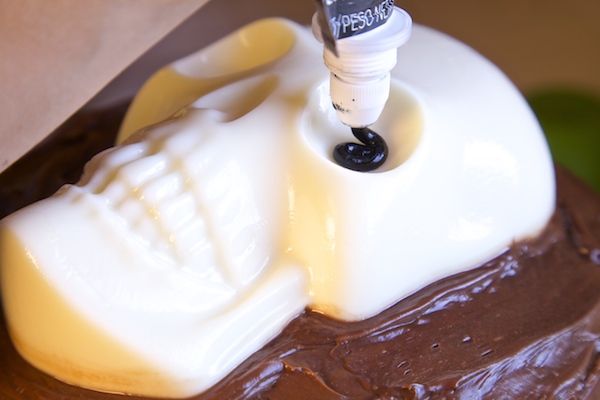
  13. Remove from oven and drop a dollop of Eagle brand sweetened condensed milk in the center of each cinnamon roll bite.
  14. It will melt a little and spread down the sides.
  15. Allow to cool and enjoy!
Disclosure:  I was invited by Pillsbury to attend the Pillsbury Bake-off.  All opinions are 100% my own.


Spicy Spinach Sauce

Spicy Spinach Sauce

Green spicy spinach sauce made with Walmart marketside organic baby spinach

Sauce please…. Can you make sure it’s extra spicy? I like to live, I love to taste, and especially when we are talking about food. I’ve recently become obsessed with making quick sauces to top my food with. Maybe it’s because my Mom is salsa crazed and I like feeding her… I don’t know, I just know I am making different (more…)

Sourdough Chorizo Cherry Stuffing

Sourdough Chorizo Cherry Stuffing

Sourdough chorizo cherry stuffing

It was Thanksgiving at my house yesterday. I made all the fixings for a Thanksgiving feast, and invited a few friends over to dive in. I decided to post this recipe out of everything that was made because (1) it’s not on my blog yet, and (2) my friends want to make it for there families this Thanksgiving. Sourdough Chorizo Cherry Stuffing…. It doesn’t get better than that.

Ingredients for Sourdough Chorizo Cherry Stuffing:

  • 8 – cups sourdough bread cubes (2 medium loaves cut into 1 inch cubes)
  • 18 – oz. Mexican soy chorizo (plastic casing removed)
  • 5 – oz. can of black olives sliced
  • 1 – onion (chopped into small cubes)
  • 7 – stalks of green onion (chopped)
  • 1 1/2 – cup grated carrots
  • 1 – cup julienned sun dried tomatoes (boiled to plump/moisten)
  • 1 1/4 – cup dried cherries
  • 1/4  –  cup fresh basil (chopped)
  • 16 – tablespoons butter or Vegan butter
  • 1 1/2  – tablespoons fresh minced garlic
  • 2 – cups vegetable broth
  • 1 – cup shredded parmesan or jack cheese cheese
  • 1 – cup salted shelled pistachios

Directions:

  1.  Cut sourdough loaves into 1 inch cubes, place in a bowl, and allow to sit over night.
  2. Preheat oven to 373 degrees Fahrenheit
  3. Place sourdough cubes on a cookie sheet and bake for 20 minutes. Mixing cubes at the 10 minute mark will prevent them from burning on one side.
  4. In a large frying pan over a medium flame add in chorizo and cook for 5 minutes until soy chorizo is crumbly and cooked through. I break the chorizo up with a spatula and mix it the whole cooking time to make sure it is cooked properly. Set to the side.
  5. In a small pan filled with water bring to a boil and add sundried tomatoes. Boil for 6 to 8 minutes to plump and moisten. Remove from water and drain completely. Set to the side.
  6. In a giant bowl add in sourdough cubes, chorizo, black olives, onions, chopped green onions, shredded carrot, sundried tomatoes, dried cherries, fresh basil, pistachios and cheese. Mix with your hands until completely incorporated. Set to the side.
  7. In a frying pan over a medium flame melt butter, once butter melts add in garlic and let cook for 4 minutes.
  8. Add in the vegetable broth to the butter garlic mixture and cook for an additional 5 minutes.
  9. Pour butter/garlic broth over stuffing mixture. Mix well to combine, careful because it is hot.
  10. Place entire mixture into an oven proof baking dish.
  11. Bake for 30 minutes.
Chipotle Albondigas And Barilla Spaghetti

Chipotle Albondigas And Barilla Spaghetti

This is a sponsored post on behalf of Barilla, however, my opinions are entirely my own and I have not been paid to publish positive sentiments towards Barilla or their products.

Chipotle albondigas and spaghetti. A beautiful latin take on the spaghetti and meatballs. Soooo good, you'll be slurping up the whole plate before you know it.

You know that feeling you get when you’re eating something that encompasses your tastes from your youth and combines them with your adult palate… That’s how I feel about my chipotle albondigas and spaghetti. It’s just so good, that the entire table falls silent when I serve it. I swear I’m not sounding my own siren, I’m just giving you the facts. It’s the albondigas in spicy chipotle sauce that remind me of my days as a teenager eating with my Grandpa, and the thick spaghetti cooked al dente that plays to my adult happiness.

A few weeks ago I flew to the Barilla headquarters in Chicago and was lucky enough to cook in their kitchen. I felt like Charlie in Willy Wonka’s chocolate factory. I was given carte blanche to anything in the fridge and pantry, and told I had 40 minutes to make something…. and that something had to BE GOOD!  When I heard that I had an itsy-bitsy anxiety attack. I quickly scanned the fridge and found ground beef and ground pork… I immediately thought of my Grandpa’s albondigas and how he mixes the two meats. I went to the pantry and sure enough they had some chipotle peppers in adobo sauce on hand, and I then knew exactly what I was making, suddenly I felt all the little ghost butterflies exiting my stomach. I ran over to the area where the wall of Barilla pasta resides with confidence and looked carefully over the many varieties before I settled on a thick spaghetti. I just love that Barilla delivers a trusted product of superior quality, providing me with pasta that does not stick or clump and a flavor that compliments my traditional Hispanic ingredients. Here’s my recipe so you can make it at home. I made it for friends this past weekend, and the table was silent.

Ingredients for chipotle albondigas and spaghetti. Just a few items for this delicious dish.

Ingredients for Chipotle Albondigas And Barilla Spaghetti:

  • 1 – pound ground beef
  • 1 – pound ground pork
  • 1 – egg
  • 1/4 – cup bread crumbs
  • 4 – cloves garlic (peeled and minced small)
  • 1 – teaspoon chile flakes
  • 1/2 – teaspoon dried oregano
  • 1/8 – cup fresh cilantro leaves (chopped)
  • 9 – springs of green onion (white part only – minced)
  • salt and black pepper to taste
  • 2 – tablespoons olive oil
  • 1 – cup onion (chopped)
  • 4 – cups chopped tomatoes
  • 2 – chipotle peppers (minced)
  • 1 1/2 – tablespoons adobo sauce
  • 1 – cup tomato sauce
  • 1 – pound Barilla thick spaghetti (no.7)
  • parmesan cheese for garnish

Directions:

  1. In a large bowl combine ground beef, ground pork, egg, bread crumbs, garlic, chile flakes, dried oregano, cilantro leaves, green onion, salt and pepper with your hands. Once mixture is combined, pinch a small amount of meat into a ball and roll to create meatball. Roll all meat until you have about 20 meatballs.
  2. In a large pan over a medium flame add in olive oil and allow it to get hot.
  3. Add in meatballs and brown on all sides for about 10 minutes. Frying albondigas for a spicy chipotle spaghetti dinner.
  4. Add in onion to meatballs and saute for about 3 minutes. Chopped onion sautés with albondias and awaits the sauce.
  5. Then add in tomatoes, chipotle peppers, adobo sauce, and tomato sauce. Mix to combine. Allow to cook another 2 to 3 minutes. Albondiagas simmer in chipotle tomato sauce..
  6. While albondigas (meatballs) are cooking bring a big pot filled halfway with water to a boil. Cook spaghetti to according to the box. Barilla think spaghetti (no. 7) about to be boiled
  7. Drain the pasta then add it to the meatball mixture. Barilla thick spaghetti being added to albondigas in a spicy chipotle sauce
  8. Mix it and serve in a big platter.
  9. Garnish with parmesan cheese. Chipotle albondigas and thick Barilla spaghetti
  10. Enjoy!
This is a sponsored post on behalf of Barilla, however, my opinions are entirely my own and I have not been paid to publish positive sentiments towards Barilla or their products.
Easy Mexican Rice Recipe Made With Hunt’s

Easy Mexican Rice Recipe Made With Hunt’s

Disclosure: This post is sponsored by Latina Bloggers Connect on behalf of Hunt’s Tomato Sauce.  The opinions are 100% my own, and the recipe is one passed on to me by my Grandfather. 

Mexican rice made with Hunt'sI can still hear my grandfather telling me in his authoritative voice “You gotta fry the rice till it looks burned, keep mixing it.” I remember at the time I used to think “burned: has this old guy lost his marbles? Who wants their rice burned.” I think back to those days when I was just learning to cook and rice seemed like such a daunting hurdle to jump. The intimidation of making a flakey rice that didn’t turn to mush seemed impossible. I used to watch my grandfather hoping for a master lesson of Mexican Rice cooking. He would fry the rice and onion until it was golden brown or as he described it burned, that was always my signal that the Hunt’s tomato sauce was sure to follow. He would allow me to pour the tomato sauce into the pan and over the rice. I loved the sound of the sizzle the tomato sauce made when it hit the hot rice, and how it bubbled along the edges. The heavenly scent of Mexican rice filled the air and I knew I was halfway there.   The most challenging part was how to boil the rice once the broth went in. My Grandfather would say “Let the broth boil, then cover the pan with the lid and lower the flame to a simmer for 20 minutes, and you’ll have perfect rice, worthy of being in the movies.”

Many authentic Mexican dishes call for the use of tomatoes, and Latinos are known for using fresh, natural, quality ingredients when they cook for their families. My Grandfather was no different and passed down his tradition of quality ingredients to make sure we were eating right. This is the way my grandfather made his rice, and it’s the way I continue to make it today…. always using Hunt’s 100% natural tomato sauce. 

Ingredients for Mexican rice

Ingredients for Mexican rice:

  • 1 – tablespoon vegetable oil
  • 2 – cups long grain rice
  • 1 – onion (chopped)
  • 2 – cloves garlic (minced)
  • 8- oz. Hunt’s tomato sauce
  • 3 – cups chicken or vegetable broth
  • a pinch of oregano
  • 1/2 – teaspoon salt
  • 1/2 – teaspoon black pepper

Direction:

  1. In a frying pan (fit with a lid) over a medium high flame, add in vegetable oil and allow to get hot.
  2. Once oil is hot add in rice, and mix to make sure all rice is coated in oil. Cook for 5 to 7 minutes or until lightly brown. rice being fried for Mexican rice
  3. Once rice is browned add in onion and garlic. Mix to combine. Cook for an additional 5 to 7 minutes or until rice is browned and is starting to look slightly burned. Adding chopped onion and minced garlic to rice
  4. Pour in the Hunt’s tomato sauce, and mix to combine. Making Mexican Rice with hunt's tomato sauce
  5. Pour in the broth. broth
  6. Allow the broth to come to a boil. Mexican-rice-boiling-in-broth
  7. Once the broth is boiling. Cover with the lid, and lower the flame to a simmer. Cook for 20 minutes.
  8. Enjoy!

Hunts Natural Logo

Disclosure: This post is sponsored by Latina Bloggers Connect on behalf of Hunt’s Tomato Sauce.  The opinions are 100% my own, and the recipe is one passed on to me by my Grandfather. 
Dia De Los Muertos Gelatina Cake

Dia De Los Muertos Gelatina Cake

Dia de los muertos gelatin cake with marshmallow flowers

What’s with Mexicans and skulls? Usually skulls are associated with a negative connatation, but for Mexicans during Dia De Los Muertos, the skull takes on a completely different and beautiful meaning. The skull represents death and rebirth, the death of somebody leaving the world as we know it, and a rebirth of your beloved one who has passed and their soul moving on to a world of spirits and the afterlife. The skull personifies the humans we once knew, and during the Day of The Dead we take the time to honor the family and friends we have lost with offerings to their spirits in the shape of the skull, the same way our ancestors had done centuries before us. Of course there are the traditional foods associated with Dia De Los Muertos like Pan De Muerto, Tamales, Sugar Skulls, and Mole. I observe those foods as much as the next person , but I also enjoy making a skull dessert and decorating it ever year along with building my in-home alter.

I needed some flowers for my home altar I’m building, where I will eventually present my foods. Once I grabbed the yellow silk marigolds I ran across a skeleton mold on my way to the check out, and quickly imagined what it would look like on top of a cake. I thought of my friend Rocio who I lost twenty years ago and how she loved chocolate cake. This year in addition to my family, I will make a special place for Rocio’s chocolate cake and decorate it in marshmallow flowers .

Ingredients for Dia De Los Muertos Gelatina Cake:

  • 2 – packets Knox gelatin
  • 1 – can La Lechera (sweetened condensed milk)
  • skeleton gelatin mold
  • Chocolate cake mix
  • eggs
  • water
  • oil
  • chocolate frosting
  • small marshmallows
  • colored sugar
  • small round colored candies
  • black icing.

Directions:

  1. In a bowl mix together 2 cups of boiling hot water and Knox gelatin. Mix until completely dissolved. Add in entire can of La Lechera and mix to combine. Should make 3 cups. Pour into skull mold and refrigerate for 4 to 5 hours or overnight. pour gelatin mixture into mold
  2. Bake cake according to box and allow it to cool completely.
  3. Assemble and frost cake with frosting.
  4. Cut marshmallows with sharp kitchen scissors diagonally.
  5. Then dip sticky side of cut marshmallow into a dish of colored sugar to color marshmallow petals. Set to the side until ready to use. cut marshmallows diagonally and dip in colored sugar to make marshmallow flowers
  6. Unmold gelatin skull from mold. Place it in the center of frosted cake. unmold gelatin for the center of the cake
  7. Decorate the sides of the cake with colored marshmallow petals, and place a small round candy in the center of the flowers. place colored marshmallow petals in a flower shape
  8. Take the black icing fitted with a piping attachment and fill the eye cavity of skull gelatin with icing. Fill eye cavity of skull with black icing
  9. Also draw a straight line across the skull mouth, then stitch over from top to bottom with black icing. Let the icing mouth sit on the gelatin skull for about 10 minutes, then remove the icing to reveal a stain.
  10. Fill the nose cavity with colored sugar.
  11. Decorate the forehead of the skull with  marshmallow flower petals.
  12. Enjoy!

PIN PICTURE BELOW FOR LATER:

An easy to make Dia De Los Muertos Gelatin Cake.  Decorated with colored marshmallow flower petals, and black icing. Day of the dead chocolate cake. Calavera made with skull mold.

Halloween Graveyard Bean Dip

Halloween Graveyard Bean Dip

A Halloween graveyard bean dip. This dip makes for a great centerpiece until your ghostly guests are ready to eat.

Are you having a Halloween party? If you are… this is a great way to kick the festivities into high gear. You see, no Halloween party would be a complete without a graveyard bean dip to dig your bones into. Party ghouls will “ooze and aah” as they see this edible cemetery is up for grabs. The ghostly haunts is filled with 8 different layers of dipping fun, and serves as a great centerpiece until people are ready to devour.  Or in my case last year, it was ZOMBIES. I went to a Zombie themed party and everybody went all out, of course they did, it was an entertainment industry party and the costumes were amazing and scary as heck. It was the funniest sight to see a dozen or so remarkably made up zombified friends of mine all corralled around this graveyard dip I made. It was as if they were real zombies and the brain appetizers had just come out from the kitchen. They all went insane for this dip, I’m not kidding when I say it’s very addicting and flavorful. I’m still kicking myself for not having a camera that night.

This year, because of how well received my graveyard bean dip was, I decided that I’m making this an annual reoccurrence. Me being who I am though, I want to make it slightly different or even try and top myself from the year before. How would I do that? A few days ago I was at my local Walmart in Rosemead walking through the massive chip aisle, as I always do because the boys in my family are chip freaks, and I happened upon a spooky treat…. Cheetos Bag Of Bones. Basically they are cheetos shaped like skeleton bones. At that moment a black lightbulb popped up over my head, and I thought “OMG, these cute little cheetos bones will add so much character to my graveyard dip.” Please check out the recipe below and the little Cheetos bones did exactly what I thought. While I was at the store I also picked up bags of candy and a cool light up pumpkin for a party table. Check out the pic at the very bottom.

Simple ingredients used to make Halloween graveyard bean dipIngredients for Halloween Graveyard Bean Dip:

  • Tostitos scoops
  •  tomatoes (chopped)
  • sour cream
  • grated cheese
  • sliced black olives
  • chopped jalapenos
  • refried beans
  • guacamole


Decorations:

  • wheat tortilla
  • Pillsbury crescent rolls
  • Cheetos ‘Bag Of Bones’

Directions:

  1. Start with a clear pyrex baking dish.
  2. Crush a thin layer of tostitos scoops at the bottom. Reserve the rest of the bag to eat the bean dip with later. Tostitos scoops serve as the first layer for bean dip
  3. Top crushed chips with chopped tomatoes.
  4. Spoon enough sour cream to cover the entire layer of tomatoes. sour cream over tomatoes
  5. Layer grated cheese on top of sour cream.
  6. Top with black olives.
  7. Sprinkle a thin layer of chopped chiles over olives.
  8. Spread refried beans over chiles. refried beans spread over chiles
  9. Make a perfect rectangle in the center of the beans and fill with guacamole.
  10. Frame the guacamole with black olive slices.
  11. Decoration for the graveyard: I started with wheat tortillas. Using an x-acto knife I cut out a tree shape, and head stones. A wheat tortilla cut into the shape of a tree with x-acto knifeThen fry on each side until crisp. wheat tortilla fried till hard for Halloween graveyard bean dip
  12. To make the floating ghosts: I unfolded the pillsbury crescent dough and carved out ghost shapes with an x-acto knife.

    Loading

    Making #Halloween come to life with these food friendly #ghosts. Graveyard recipe up on my blog later today! #WMTMoms @walmart

    View on Instagram

     Then baked the dough ghosts until golden crisp (according to package for time and temperature), once they came out of the oven I shoved a stick into the ghost and allowed them to cool completely with the stick in.

  13. Assemble the tree slightly off center of rectangle. Then place the ghosts where you feel they will be the most visible. Stick the different sized head stones into the guacamole, then place a cheetos skeleton bone skull at the base of the head stone. A close up look at Halloween graveyard. I used Cheetos 'Bag Of Bones' skulls for the headstones. a closer view of Halloween graveyard bean dip  The big ghost for Halloween graveyard bean dip Over head view of Halloween graveyard bean dip
  14. Serve warm or cold.
  15. Happy Halloween! Enjoy!

Pin this pic for easy instruction: Easy steps to make this Halloween graveyard bean dip. I used tortilla to create the trees and headstones, and pillsbury crescent dough to make the ghosts. Can be enjoyed warm or cold.


Candy For Pumpkin:

  • Snickers (fun size)
  • Twizzlers (caramel apple )

pumpkin candy

Walmart-Moms-Disclaimer.2013