Category: Presley’s Panaderia “Bakery”

Dia De Los Muertos (Day of the Dead) and Pan de Muerto recipe… Embraced Rituals.

Dia De Los Muertos (Day of the Dead) and Pan de Muerto recipe… Embraced Rituals.

 I’ve been celebrating Dia de los Muertos (Day of the Dead) since I was a young girl.  As I get older, the holiday grows in importance.  Over the years I have lost many who are near and dear to me.  Death is such a sad, wild reality, but one we must all face.  I have spent many days mourning the death of loved ones lost and find Dia de los Muertos is a happy medium.  Its a day to honor and remember a departed loved one’s spirit by offering their favorite food or beverage.  Many people build private alters in their homes (we did), and some build them at events for remembrance and festivity.  This weekend we went to the 12th annual Dia De Los Muertos Celebration at the Hollywood Forever Cemetery.  In my opinion it is one of the BEST events that takes place here in Los Angeles.  I go every year and wouldn’t think of missing it!  You can expect everything from Aztec dancers, Mayan rituals, paper mache skeleton procession, costume contest, ballet dancing, performance art, craft and art vendors, yummy mexican food, micheladas, and some of the best altars you’ve ever seen!  Here is a nice collection of photos from the event.  If you don’t live in Los Angeles, Google a Dia de los Muertos event in your city.  The actual holiday takes place Nov. 2nd.

All photos taken by: Mando Lopez and Nicole Presley


Pan de muerto is traditionally offered to the spirits in the upcoming days leading to Dia de los muertos (Day of the Dead), which is celebrated Nov. 2nd.  You can leave it at the gravesite of your loved one along with their favorite food or at a homemade altar.  Here is a simple recipe for you to make your own.  BTW….. it’s not just for the departed, the living find it tasty too!

Ingredients for pan de muerto: 

1/4 – cup milk

4 – tablespoons butter

1/3 – cup sugar

1/2 – teaspoon salt

1 – package active dry yeast

1/4 – cup warm/hot water

2 – eggs (beaten)

3 – cups all-purpose flour

1/2 – teaspoon anise seed

1/4 – cup orange juice

1/4 –  teaspoon ground cinnamon

1/4 – cups sugar plus 2 tablespoons

In a sauce pan over a low medium flame melt butter and stir in milk. Bring to slight boil and remove from heat.  Add in 1/3 cup sugar and salt, and mix well to combine. Set to the side.

In a very large bowl, mix yeast and warm/hot water together and stir until yeast is dissolved. Let it rest for 15 minutes to cool down then add the milk mixture.

In a medium bowl mix flour and anise seed together . Then add flour and anise seed mixture to yeast/milk mix, and gradually work in the beaten eggs. Mix until dough forms into a ball.

Flour your work surface well and place dough in the middle. Knead for 5 minutes or until dough is nice and soft. Place it back into the large bowl and cover with a kitchen towel or plastic wrap. Let dough rise in a warm place (inside your oven when it’s off) for an hour and a half to two hours. Meanwhile, grease a baking sheet and set to the side.

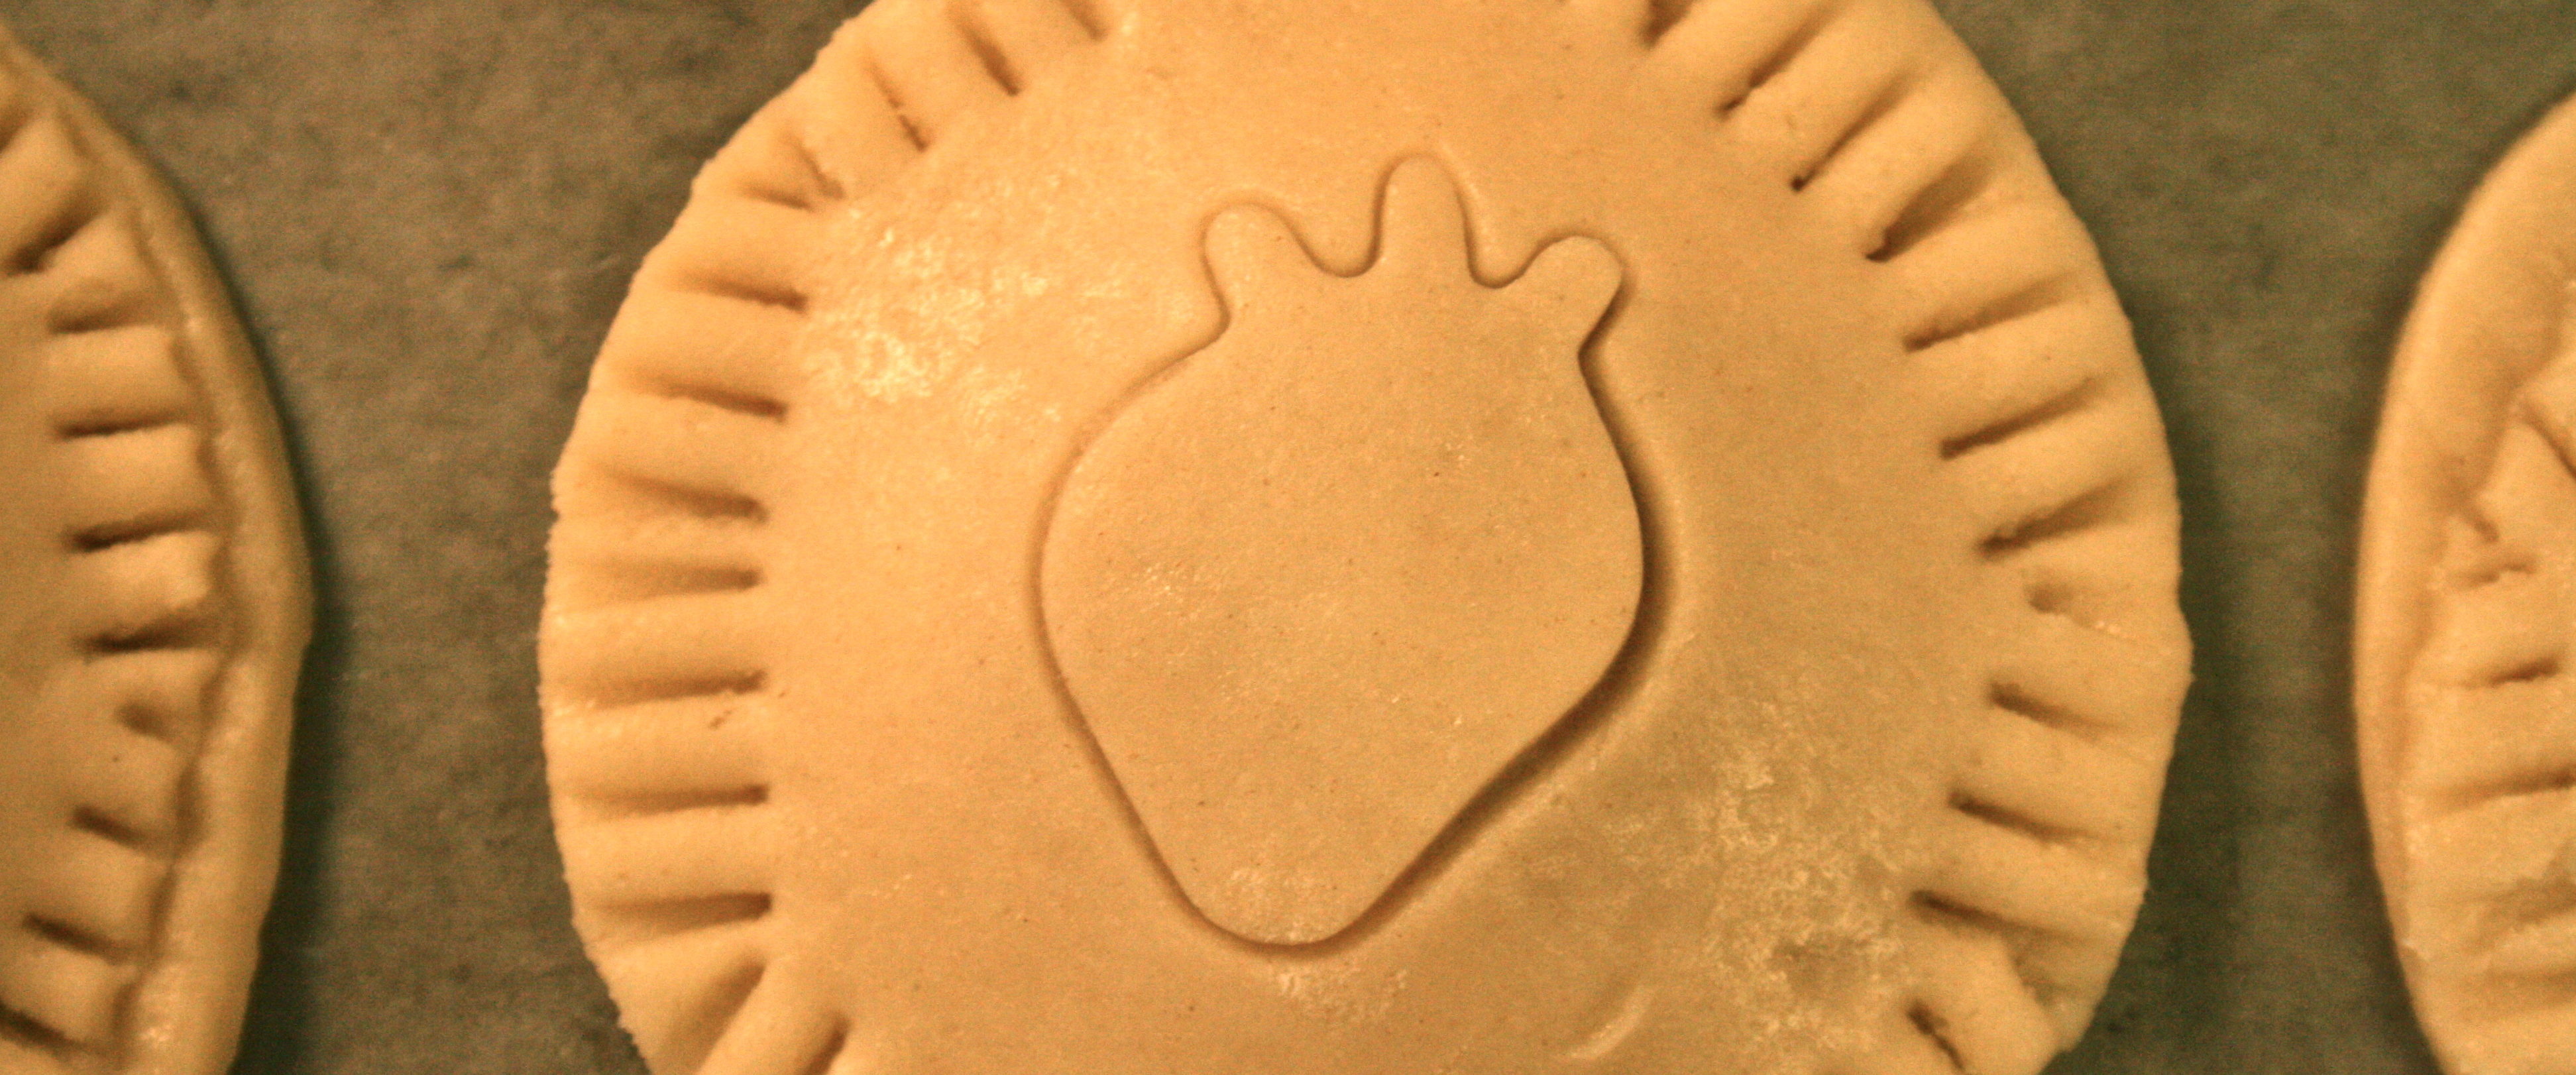
Then remove dough from large bowl and punch it down and shape it into one large loaf or several small loaves. Reserve a small portion of dough to make a knob on top of loaf or braids around the loaf, or little strips to represent bones. Form your loaf then place on greased baking sheet and cover loosely with plastic wrap or kitchen towel for another hour (in a warm place) or until it’s doubled in size.

Then preheat oven to 350 degrees fahrenheit, and bake for 35 to 45 minutes. If you make small loaves then 35 minutes…. if you make one big one 45 minutes. About 5 minutes before the pan de muerto is done baking….. make the glaze.

In a small saucepan over a medium flame add orange juice, cinnamon, and 1/4 cup sugar. Bring to a boil and remove from flame. Set to the side. Next remove pan de muerto from oven and let cool slightly, then brush with glaze. Then sprinkle glazed bread with remaining 2 tablespoons sugar! Celebrate Dia de los muertos by offering your loved one a pan de muerto this year!

Con mucho amor!

Presley’s Strawberry Cream Hand Pies!

Presley’s Strawberry Cream Hand Pies!

I woke up today and realized the month of September was coming to an end….  I smiled at the thought of fall and all my jacket wearing days that lay ahead.  Then for a brief moment I started to panick thinking with the warm weather sneaking out the back door my beloved strawberries would be taking a leave of absence as well.  Oh the horror!  As soon as the thought entered my mind it was rescued with the realization that California strawberries are grown all year long , and could be picked up fresh or frozen.  Either way I’m going to celebrate my california strawberries this fall/winter wearing a jacket!

All photos taken by: Nicole Presley 

Ingredients for strawberry cream hand pies:

2 1/4 – cups flour

1/2 – teaspoon baking powder

2/3 – cup sugar

6 – tablespoons cream cheese (room temperature)

1 – stick butter (room temperature)

1 – teaspoon pure vanilla extract

1 – large egg

Mix flour, baking powder and sugar in a bowl and set to the side.  Then put cream cheese and butter in an electric mixer and mix for 3 minutes or until fluffy.  Add vanilla and egg in and mix well.  Then slowly add in flour mixture until combined.  Divide dough in half and pat into two disks.  Wrap with plastic wrap and place in fridge for an hour or over night.


Preheat oven 350 degrees Fahrenheit.  Line cookie sheets with wax paper or a non – stick baking mat.

Take one disk of dough of of the fridge.  On a lightly floured surface roll dough about 1/4 inch thick.  With a round 2 1/2- inch circle cookie cutter cut as many circles as possible. With the scraps re-roll and continue cutting until you’ve cut all the dough.  Then place your circles on prepared cookie sheets and place back in the fridge for 15 minutes.  Grab your second disk and repeat process.


While you are waiting for your dough to chill, let’s make the filling.

Ingredients for the filling:

6 – tablespoons cream cheese (room temperature)

3 – tablespoons confectioners sugar

1/3 – cup strawberry preserves

3 – strawberries chopped


Mix cream cheese and confectioners sugar with an electric mixer till combined, then set to the side in a small bowl.  Chop strawberries into tiny pieces and mix into perserves in another bowl.


On half of the pie circles place 1/2 teaspoon of cream cheese mixture in center of circle, then place 1/2 teaspoon of strawberry mixture on top.


Now on the other half circles take a small cookie cutter and barely imprint the center with the cutter (I used a strawberry cutter, this step is optional) make sure not to push all the way down.  This is purely for decoration.  Then place pie circle on top of circle with cream cheese and strawberry mixture to make your pie.  Press around the edges with your finger to seal, then take a fork and indent all around.


Place in the oven and bake for 7 minutes then rotate cookie sheet and bake for another 7 to 8 minutes or until edges are golden.  Remove from oven.

Ingredients for topping: 

1/2 – cup sugar

1 – teaspoon cinnamon

Mix sugar and cinnamon in a small bowl.  Then dip each hand pie in sugar mixture while still warm set on wire rack to cool completely!  Enjoy.  Should make 15 pies total.


Strawberries wrapped in warmth!  

Lay your eyes on my Coconut Flan.

Lay your eyes on my Coconut Flan.

I am known to adore many things, but one of my favorite foods is coconut.  I heart coconut confections, cookies, cakes, paletas,  you name it…. if one of the ingredients is coconut there is a good chance I love it.  The real truth is I have never made anything from a whole coconut, I usually buy the shredded sweetened coconut in a package, and go from there.  This time I tested my kitchen skills and decided to break open a fresh coconut to make a coconut flan.  I was nervous to see what the results would bring.  Me and my loved ones were smitten by the gorgeous scent this flan perfumed my kitchen with, so the anticipation of the actual taste was utter excitement.  ONE bite in,  I knew this flan was the one for me…. I’ll never be the same.

All photos taken by: Nicole Presley 

Ingredients for coconut flan:

1 – Melissa’s Produce sweet young coconut (to make 12 oz. coconut milk)

5 – large eggs

6 – ounces cream cheese

1/2 – tablespoon almond extract

1/2 – tablespoon vanilla extract

1 – can sweetened condensed milk (14oz.)

3/4 – cup cajeta

3/4 – cup shredded sweetened coconut


Preheat oven to 350 degrees Fahrenheit.

First things first. Take your sweet young coconut and cut off the diamond shaped point on top with a sharp knife. Then poke a hole in the exposed shell and pry off the circular crown.


Drain and reserve all the liquid. Once all the liquid is drained, break the coconut in half and spoon out the flesh.


Marry the two in a blender and blend for 3 minutes to get a thick coconut milk. Then pour through a sieve and collect the coconut milk…. this should make 12 ounces.


Pour coconut milk back in the blender, along with the eggs, cream cheese, almond extract, vanilla extract, and sweetened condensed milk. Blend for a minute or until completely combined.

Spray a bundt pan with a non stick baking spray, then fill the bottom with cajeta.

Next pour in flan mixture. Then top with shredded sweetened coconut.


Cover the pan with aluminum foil and place inside a large pyrex baking dish. Pour hot water into the pyrex baking dish to fill up half way.

Then place the baking dish into the oven and bake for 1 hour.

Once out of the oven, remove from water bath and uncover to allow cooling. Run a small knife around the edge to ensure it from sticking.  Let the flan rest for one hour then flip it over onto a plate. Slowly lift pan up away from plate. Then put in the fridge for 5 hours or overnight.  ENJOY!!!!!!

No compensation was received for this post. I was provided with a sample of  Melissa’s Produce young sweet coconuts to aid this recipe. The recipe and opinions are my own.


Membrillo, Manchego, Crema, and Pistachios= Decadent Dessert

Membrillo, Manchego, Crema, and Pistachios= Decadent Dessert

When I eat this dessert I feel like I should be sitting at a table surrounded by aristocrats. Oohing and Awwing over the beauty of the taste that has somehow caught people off guard.  This dessert is magical in the way of being able to transport me to many places, it reminds me of times in my life I will never forget.  It is the taste of conversations with my dearest friend. It is the taste I remember most when my palate was coming of age. It is the taste of unusual decadence. It is the taste of my Latina culture amplified by 10. The pairing of Wonderful Pistachios with membrillo, manchego, and cream is a taste EVERYONE should be fortunate enough to savor and enjoy!

All photos taken by: Nicole Presley

This recipe will make 4 desserts

Ingredients for decadent dessert:

A slab of membrillo (quince jam)

1/4 – cup grated manchego cheese

1/8 – cup whipping cream

10 – wonderful pistachios (chopped)

For a single serving…. grab a little dessert plate and place a small slice of membrillo in center.

Then take a small pinch of grated manchego  and place on top.

Then pour a little bit of whipping cream over the top.

Lastly sprinkle with your chopped Wonderful Pistachios…. A pairing worth celebrating!

Try not to gobble it all down in two seconds!

No compensation was received for this post. I was provided with a sample of  Wonderful Pistachios to aid this recipe. The recipe and opinions are my own.

Here’s a cute idea if your having a dinner party…. serve your dessert in a spoon for a bite size portion.


Ay cabron, que bueno!


Rockin Salted Pistachio Toffee Smothered in Chocolate

Rockin Salted Pistachio Toffee Smothered in Chocolate

In the words of Annabella from Bow Wow Wow…. “I Want Candy!” Aside from wanting candy all the time, I also want my favorite nut, pistachios. Why not combine the two for a perfect pairing and take my sweet nutty cravings to a new level of BIG LOVE.

All photos taken by: Nicole Presley and Mando Lopez

Ingredients for pistachio toffee:

1 – cup butter (melted)

1 1/3 – cups sugar

1 – tablespoon corn syrup

2 – tablespoons cold water

1/2 – teaspoon vanilla

1 1/4 – cup salted Wonderful Pistachios

12 – ounces chocolate chips (melted)


First line a cookie sheet with a non- stick baking mat or wax paper. I use both, but I’m a freak… One method is good enough.

Then take your bag of Wonderful Pistachios, cut it open and GET CRACKIN! I like to shuck my pistachios before I start making the toffee.  Once done removing shells place 1 cup of pistachios to the side, and with the remaining 1/4 cup coarsely chop.

Let’s get the toffee rockin and rollin…. In a big pot over a medium flame with a candy thermometer attached to the side, drop in butter and allow to melt. Mix with rubber spatula.

Then add in sugar, and mix in completely before adding in corn syrup and water. From this point forward you will be mixing constantly.

Keep stirring your buttery sugar mixture until your candy thermometer reads 300 degrees fahrenheit.  This will take about 15 to 20 minutes and your mixture will go from pale brown to deep golden brown. Then remove from flame and add vanilla. Your mixture will bubble and pop. This is good news!

Add 1 cup of Wonderful Pistachios, and mix well.

Then pour onto prepared cookie sheet and top with melted chocolate.

Spread chocolate carefully over top of toffee to coat it!

Then if your anything like me…. you’ll run off and hide somewhere and eat the chocolate off the spatula.


Okay back to work…. Sprinkle remaining 1/4 cup pistachios on top of chocolate, and place in the fridge overnight or for at least an hour.

When ready to eat. Break it into pieces or eat the whole slab! Enjoy!

No compensation was received for this post. I was provided with a sample of  Wonderful Pistachios to aid this recipe. The recipe and opinions are my own.

Makes my mouth water.

Blueberry Pluot up-side down cake

Blueberry Pluot up-side down cake

A good friend of mine asked me for a dessert recipe that not only taste good, but is simple to prepare and appealing to the eye.  I immediately thought of an up-side down cake.  I happened to have a tribe of pluots hanging out in my kitchen fruit bowl, and a box of cake mix in the pantry.  I thought to myself  “why wouldn’t those little pluots make for spectacular cake?”  They did.  I incorporated blueberries in the mix for an added “OH MY WORD”, and the results left me ecstatic.  Ended up making this cake two days in a row, because I couldn’t keep it around long enough to photograph.  Enjoy!

All photos taken by: Nicole Presley

Ingredients for blueberry pluot up-side down cake:

1 – box yellow cake mix (I use Betty Crocker)

1 1/4 – cups water

1/3 – cup vegetable oil

3 – eggs

1 1/2 – cups blueberries

6 – tablespoons butter

1 – cup brown sugar

4 to 5 – large pluot (each pluot cut into 4 parts, then each part sliced into 3 pieces)


Preheat oven to 350 degrees Fahrenheit.

In a mixer add cake mix, water, vegetable oil, and eggs. Mix until combined for 2 minutes. Then add 1 cup of blueberries. Set to the side.

In a small saucepan over a medium flame add butter and allow to melt. Once melted mix in brown sugar. Mix well for 1 minute. Then pour into a 13 x 9 metal pan.

Now neatly place your pluots in a row on top of melted brown sugar mixture. Then sprinkle with 1/2 cup of blueberries.

Next pour cake batter over top of fruit.

Place in the oven and bake for 50 to 55 minutes or until the tester toothpick inserted in the center comes out clean.

Once the cake comes out of the oven let it sit in the pan for 2 minutes, then turn pan up-side down onto a big platter and remove pan. PRESTO! Up-side down BLUEBERRY PLUOT cake…. YUMMERS.


BNB (Bacon, Nutella, and Banana) croissant sandwich

BNB (Bacon, Nutella, and Banana) croissant sandwich

I have a confession to make.  You see this sandwich pictured above, I eat it often and more than anyone should admit.  I’m trying to cut back, but it’s so banana fresh, salty, sweet, flakey, and chocolatey.  Usually I have it on a big croissant, but recently Thomas came out with pre sliced sandwich croissants that are slightly bigger than my palm and only 160 calories.  The way I look at it…. I am cutting back with the perfect sized croissant sandwich.  Now I could enjoy the best of both worlds and not feel guilty about it.

All photos taken by: Nicole Presley

Ingredients for BNB croissant sandwich:

1 – Thomas sandwich croissant

1  to 2 – tablespoons Nutella (depending if you want to spread on both sides of croissant)

1/4 –  sliced banana

4 – slices of thick sliced cooked bacon


Take your croissant and spread nutella on one half or both.

Then take a few slices of banana and place on top of nutella.

Then take your scrumptious bacon and place on top of banana.  Top with other half of croissant.  That’s it your done.

Sink your teeth into happiness

No compensation was received for this post. I was provided with a sample of  Thomas sandwich croissants to aid this recipe. The recipe and opinions are my own.