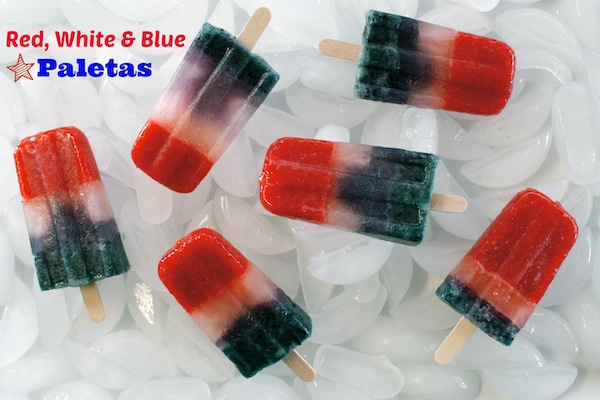
Red White and Blue Lemonade Paletas
We are heating up in Los Angeles, and 4th of July is around the corner… that can only mean one thing…. Paleta time! These strawberry, blueberry, and chia seed lemonade paletas had to be made.
Ingredients for Paletas:
- 3/4 – cup fresh strawberries
- 1 – cup sugar
- 2 1/2 – cups water
- 5 – lemons (juiced)
- 1/2 – tablespoon chia seeds
- 3/4 – cup fresh blueberries
- Paleta mold
Directions:
- Add blueberries, 1/4 cup sugar, and 3/4 cup water to a blender and blend on high until smooth.
- Pour the first layer into popsicle molds filling them only 1/3 of the way up.
- Place in the freezer to set first layer for 3 hours.
- Next mix lemon juice and 1/2 cup sugar in a bowl. Mix until sugar is completely dissolved. Add in 1 cup water and chia seeds to lemon/ sugar mixture. Set to the side for chia seeds to expand while you wait for the first layer to freeze.
- Now pour the chia seed lemonade mixture into the molds and fill up to the 2/3 mark. Place sticks into the paletas and place bak into the freezer for 2 hours.
- Add strawberries, 1/4 cup sugar, and 3/4 cup water to a blender, and blend until pulpy but slightly smooth. Pour the strawberry mixture into the paleta molds to the top. Place in the freezer overnight.
- To unmold paletas by placing molds into a bath of luke-warm water for 20 to 25 seconds then gently pull out.
- Enjoy!