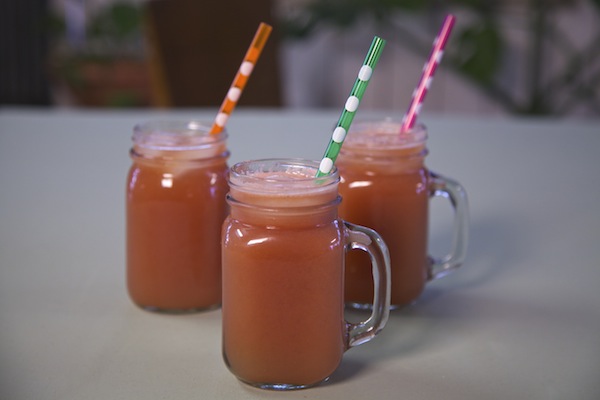
Muscat Grape And Watermelon Water: Agua De Uvas Y Sandía
Disclosure: This post is sponsored by Whole Foods Market. The recipe and opinions are 100% my own.
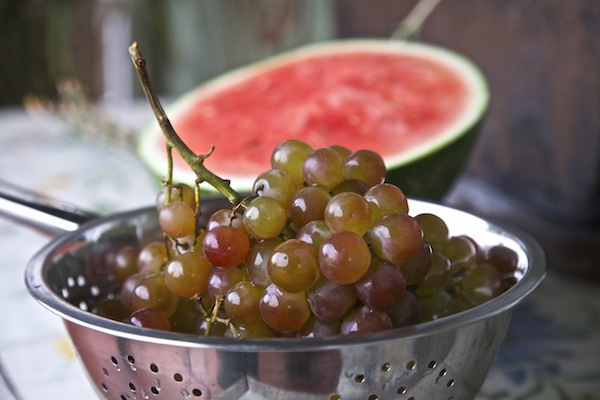
There is no other way to describe this drink other than “Mmmmm, that’s good.” Those were the first words out of my fiances mouth as I poured him a tall sip. Let me rewind a little and tell you the back story. It starts with Muscat grapes. Have you ever tried a Muscat grape? The Muscat Grape is a pink seedless grape, with a very sweet and rich flavor. These grapes come all the way from Chile and range in color from light green to deeply blushed with pink (the ripest and best), with a softer succulent texture. Basically they are a dreamy grape that need to be adored. The tricky part is they are only available for a short time at Whole Foods Market in my lovely California, from now thru late mid-April. Okay, with those facts in mind I know that I am only able to appreciate their beautiful-ness for a short period of time. SO, the other day I was at Whole Foods Market buying some mangos and a pile of cheese when I spotted the muscat grapes. I made a serious bee-line for them and started to stock up. My fiance says “What? Why are you buying so many grapes?” I come back at him with “Well my Tia Brilla is in town and what if she wants grapes, and maybe we can freeze some and have as a healthy late night snack, and they taste great in salads, and I’ve been wanting to make agua de uvas.” He shook his head, and gave me a look like I was CRAZY! Until he tried them himself of course. Isn’t it always like that? I definitely threw some in the freezer, add a few to a salad I made over the weekend, served my Tia Brilla some during her visit, and made a big jug of agua de uvas y sandía. YUM! I highly suggest you stock up now, before it’s way too late.
Ingredients for grape and watermelon water:
- 2 – pounds muscat grapes (seedless) (stem removed)
- 8 – cups of chopped up watermelon (peeling removed)
- 6 – cups water
- 1/2 – cup sugar
- 2 – limes (juiced)
Directions:
- Place grapes in blender with 1 cup water. You may have to do this step several times depending on the size of your blender.
- Blend until smooth.
- Pour grape blend through sieve and allow all liquid to pass through and fall into a pitcher. This step will collect all the skin from the grapes. You may have to scrape the inside of the sieve with a spoon to allow any remaining liquid to pass through.
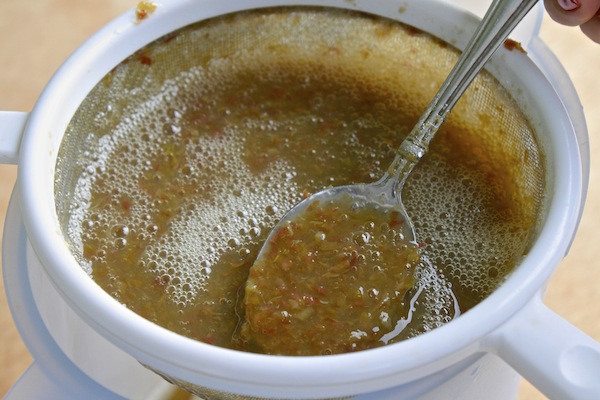
- Next blend all the watermelon. Again add a cup of water to the blender and this time add in the sugar. Blend till smooth.
- Pour watermelon blend through the sieve and allow it to fall into the same pitcher as the grape blend.
- Add in remaining water and lime juice. Mix to combine.
- Chill in fridge until super cold.
- Serve and enjoy!