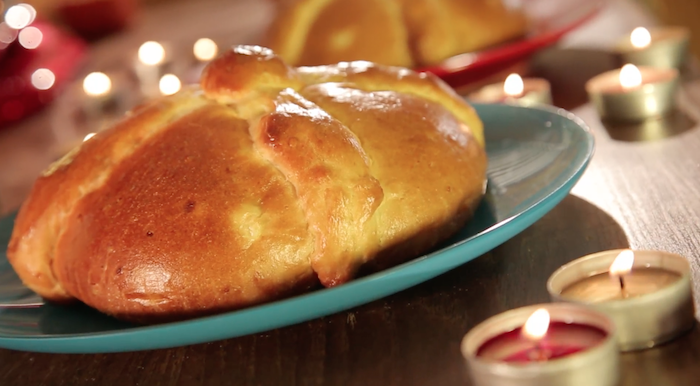
Potato Pan De Muerto For Dia De Los Muertos
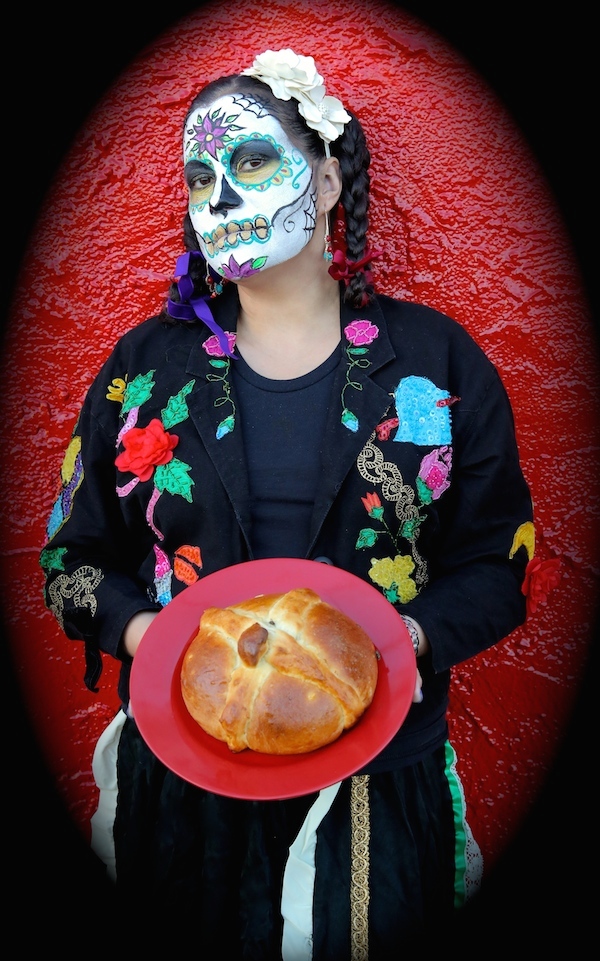
Dia de los muertos couldn’t be celebrated without the age old tradition of pan de muerto. I am thrilled to make a beautiful potato version of this “bread of the dead” in honor of my beloved departed uncle. I will make two loafs…. one to eat, and one to decorate my home alter with. How will you celebrate Day of the dead? Watch my video below to see how easy it is to make this delicious bread.
Ingredients for Potato Pan De Muerto:
- 1 – package active yeast
- 1/2 – cup luke warm water
- 1 – teaspoon salt
- 1/2 – cup sugar
- 1 – cup mashed Idaho potatoes ( leftovers work best)
- 1/2 – cup butter (softened)
- 2 – eggs (beaten)
- 3 – cups bread flour plus more for kneading
- olive oil
- Egg wash (1 egg and 1 tablespoon water whisked together)
Directions:
- Add yeast and water to a mixer, and allow yeast to activate for 10 minutes.
- Pour salt and sugar to the yeast mixture. Give it a good mix.
- Spoon in the mashed potatoes and break them up with a spoon if you need to. Then add in the butter and eggs. Mix to combine to hook attachment.
- Add in the bread flour, one cup at a time until the dough comes together and no longer sticks to the mixer about 5 minutes.
- Generously flour a clean work surface then knead dough until smooth.
- Grease a bowl with a little bit of olive oil. Place dough in greased bowl and turn it once inside to ensure the entire dough is well greased.
- Cover dough with a kitchen towel and let it rise for 2 hours.
- Remove towel and punch down the dough.
- Generously flour a clean work surface then knead dough again until smooth.
- Grease two 8 -inch cake pans and set to the side.
- Divide the dough into equal 3 parts.
- Place two of the parts in each cake pan, and reserve the additional part for decorating.
- Allow the dough to sit for an additional hour before decorating.
- Preheat the oven to 375 degrees Fahrenheit.
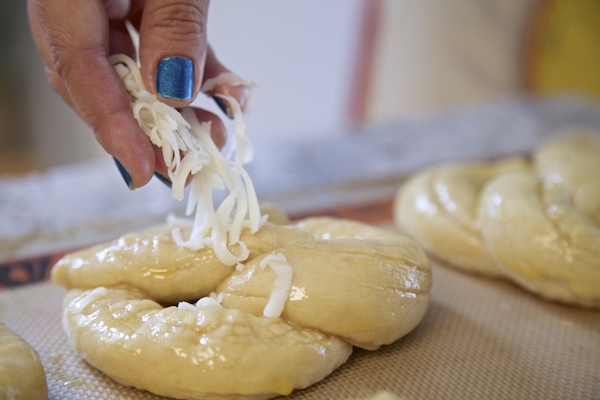
- With the extra part, roll the dough out to make bone decorations for the top of the loaf.
- Brush the top of the loaf with egg wash.
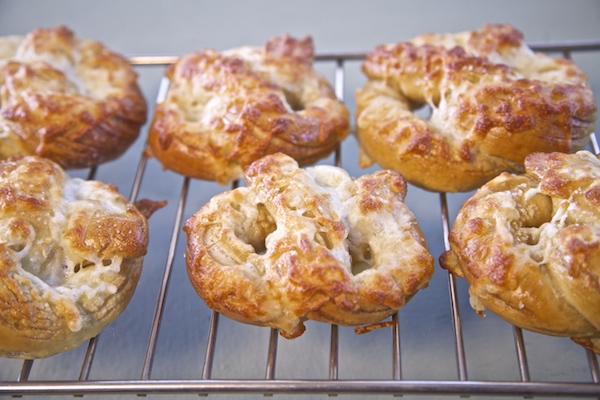
- Bake for 25 to 30 minutes or until golden brown.
- Enjoy!
 I would like to give a special THANK YOU to the Idaho Potato Commission for sponsoring this video. It is my absolute honor to work with you.
I would also love to Thank my amazing crew.
Mando Lopez: Director/Editor
Tony Molina: Director of Photography
Jeshua Viveiros: Sound and the awesome calaca make-up artist – he used the Crafty Chica make-up line.